ATtiny as Arduino with Eclipse
I learned about the power of Eclipse as an IDE after many years with VIM, when I started developing in Java. This is when I learned that Eclipse can do magic when working with Java. Later along the road, envious of the ease of writing Java code in Eclipse, I discovered that also with C++ Eclipse can still give me much more than the VIM plugins which I downloaded and wrote myself. That is not to say that I’ll use Eclipse for everything, but at least for Arduino projects I found that it is the best solution for coding, source browsing, build and upload.
I’m going to use ATtiny84 as an example here. The general idea should work for most ATtiny cores.
Preconditions for using ATtiny as Arduino with Eclipse
I’m not going to delve into the items in this section since you can find on google all the information you need.
if you want to use your Arduino as an ISP for the ATtiny (like I do) –
– Upload the “Examples->Arduino as ISP” to the Arduino (do this from the Arduino IDE).
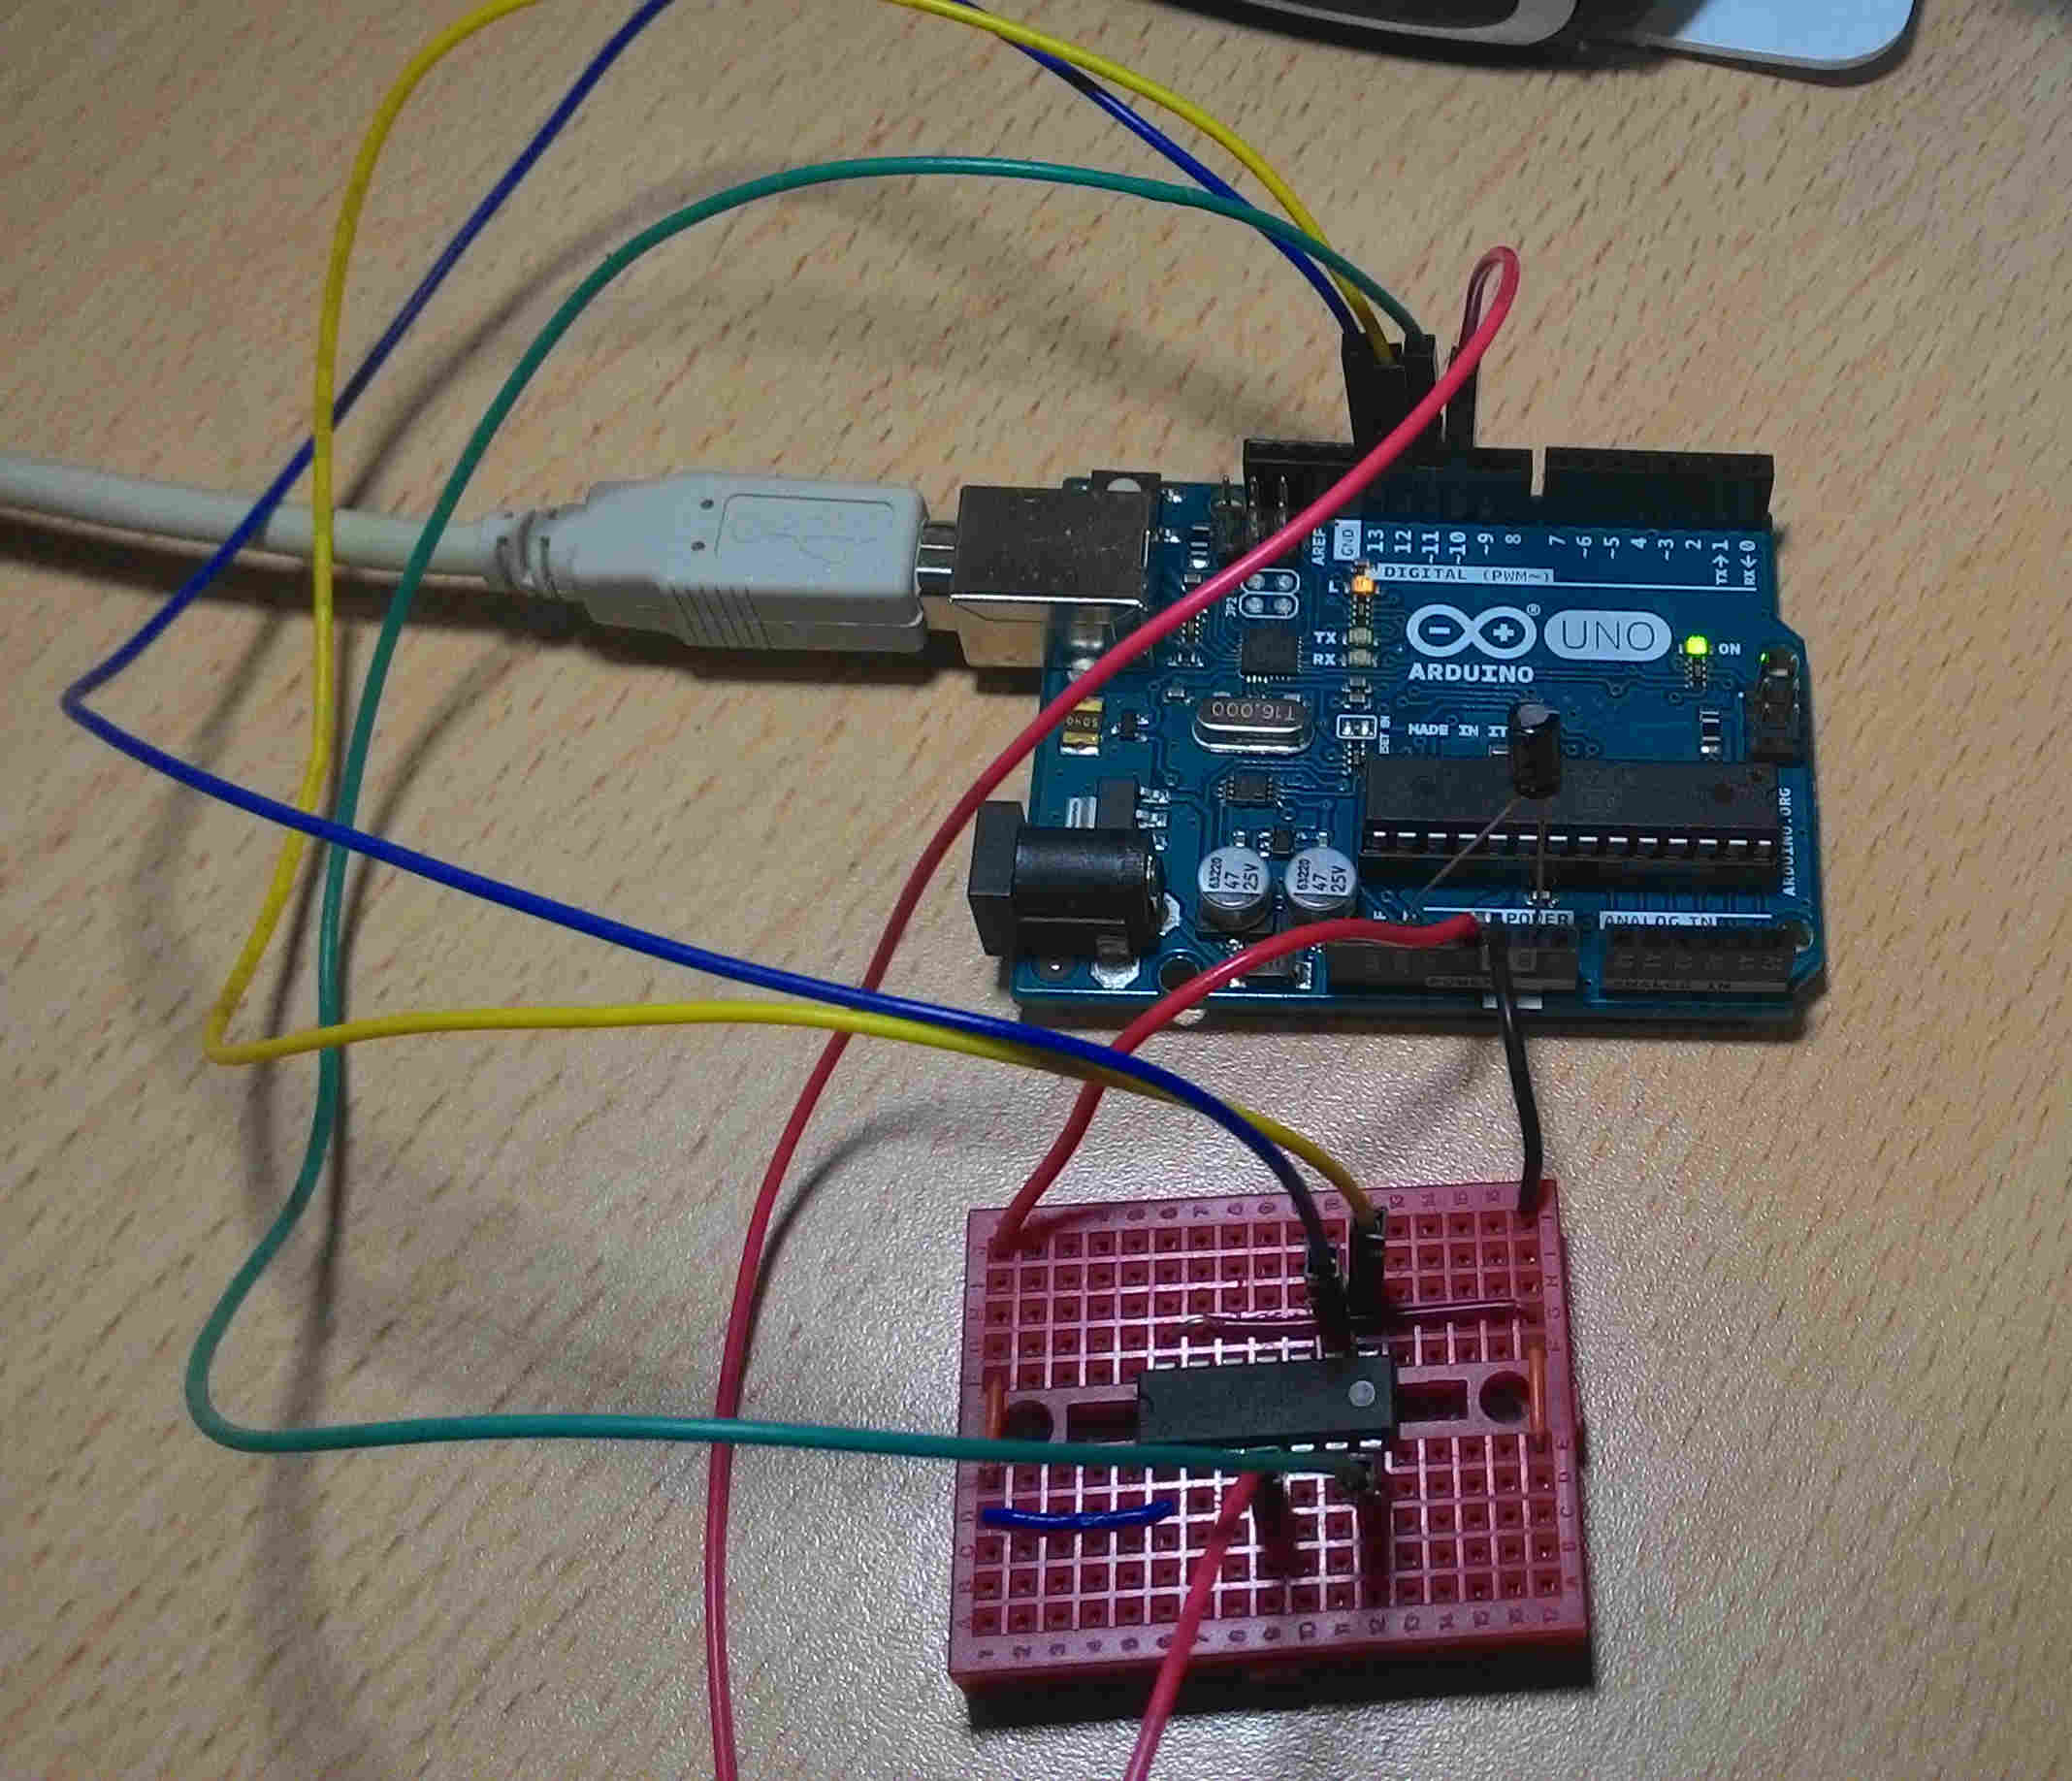
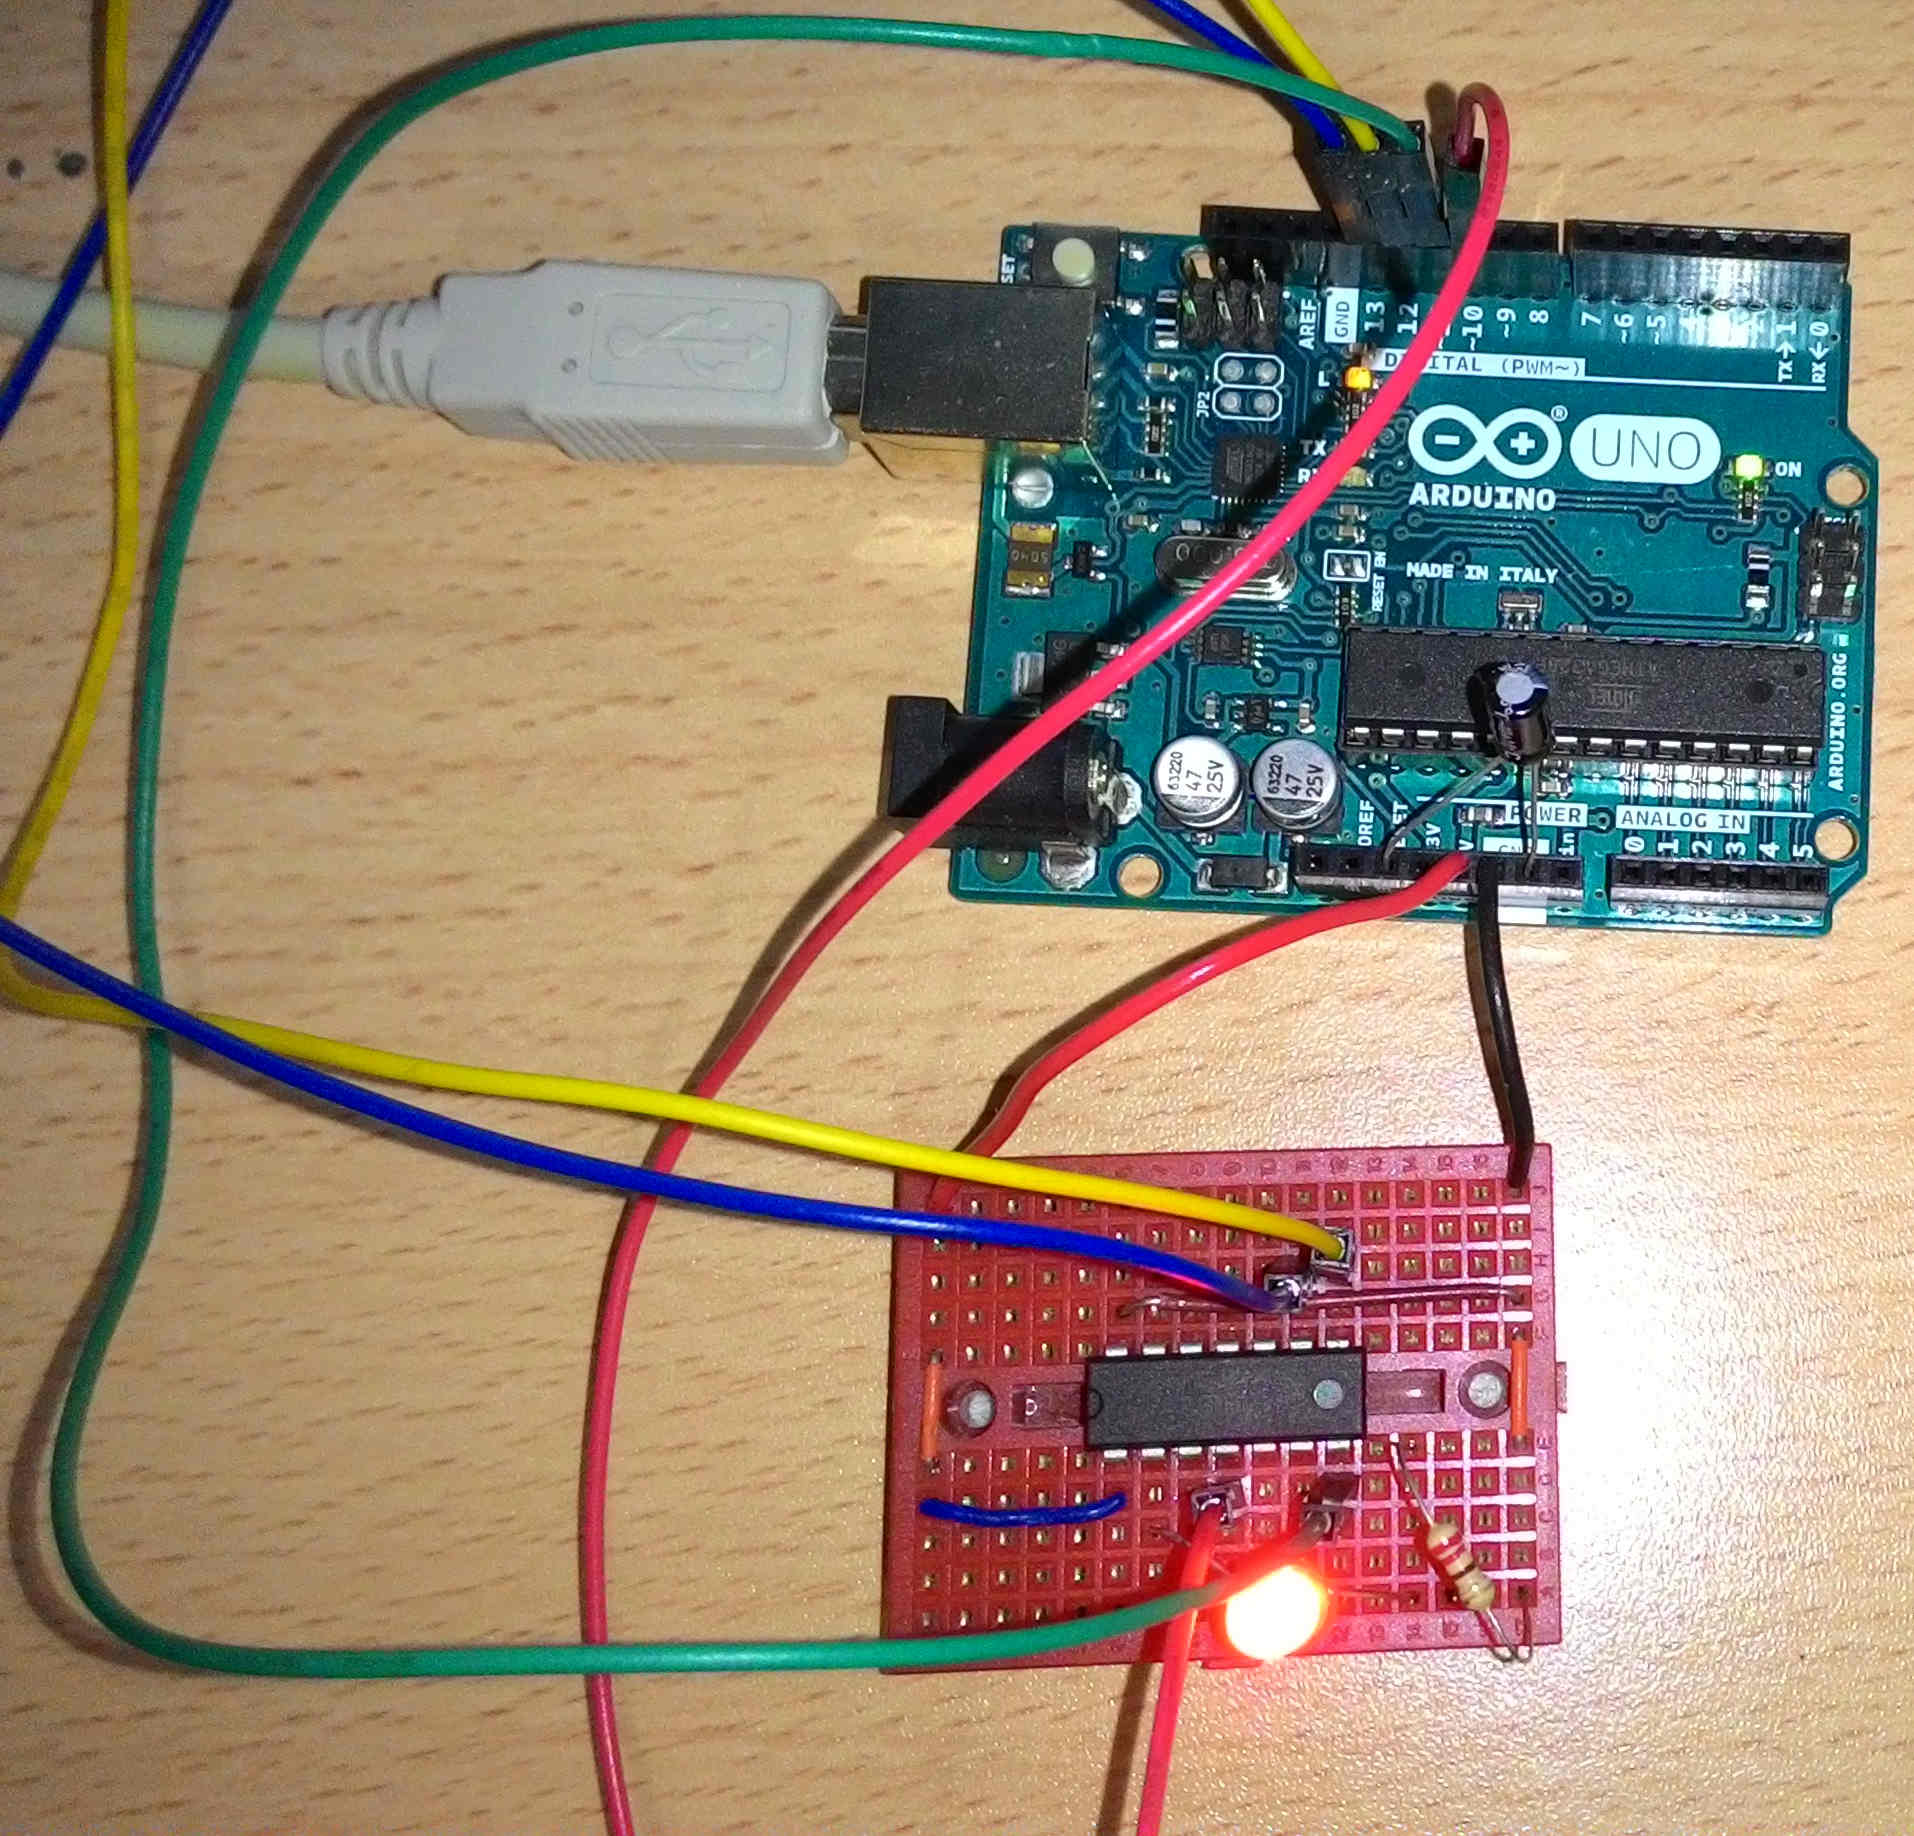
– Connect the Arduino to the ATtiny, as described here, resulting in something like this for ATtiny84:
 (click to enlarge)
ATtiny as Arduino with Eclipse
At least for the Sloeber plugin version I’m using (3.1), trying to add ATtiny boards was far from transparent. I’m documenting how I solved it below with lots of pictures. If you follow these guidelines carefully then you’ll see it really works like a charm and even not that much of a hassle after the initial one time setup.
UPDATE: as you see in the comments section a nightly build of the Sloeber plugin will probably solve the issues I’m solving manually below. So this is an option for you if you want the cutting edge plugin version.
One time preparations
- Install the AVR toolchain (if it’s already installed, then know where the executables are). This is how it’s done on Ubuntu:
sudo apt-get install gcc-avr avrdude avr-libc gdb-avr
- In eclipse, Windows->Preferences you have a location for private hardware and libraries. Especially relevant is the private hardware location:
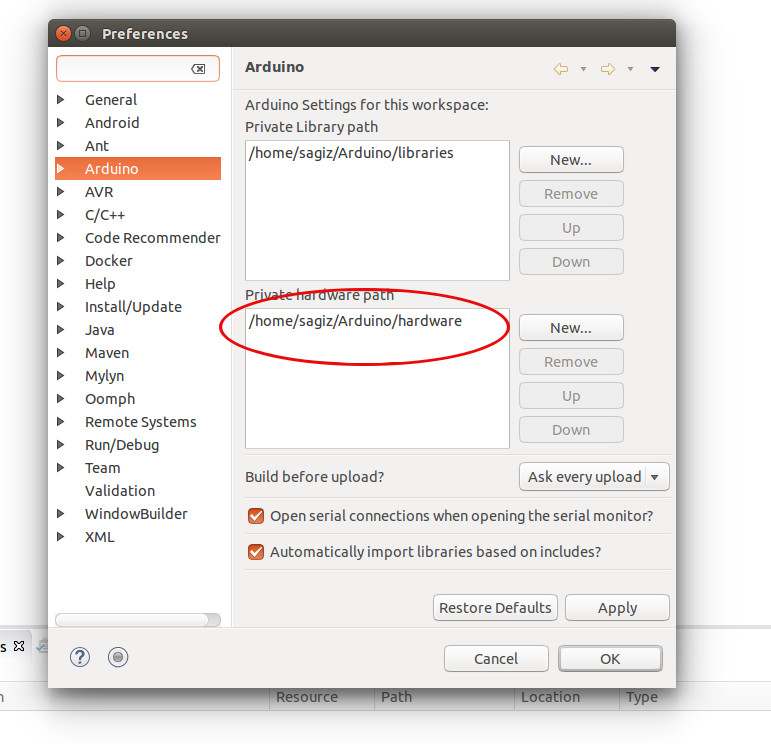
- Accordingly, this is how I put the additional ATtiny hardware in /home/sagiz/Arduino/hardware on Ubuntu:
cd ~/Downloads
wget https://github.com/SpenceKonde/ATTinyCore/archive/v1.1.1.3.tar.gz
mkdir -p ~/Arduino/hardware
cd ~/Arduino/hardware
gunzip -c ~/Downloads/v1.1.1.3.tar.gz | tar xvf -
- Now we have to update the platform.txt to have the correct path for compiler and avrdude. What we need to modify is the compiler.path and the tools.avrdude.path. Here is how I do this on Ubuntu (you can instead open the file and manually make the changes):
cd ATTinyCore-1.1.1.3
cp platform.txt platform.txt.orig
perl -i -pe 's/^compiler.path.*$/compiler.path=\/usr\/bin\//;s/^tools.avrdude.path.*$/tools.avrdude.path=\/usr/;' platform.txt
As evident from the last perl command, I’m setting the compiler.path to the folder where avr-gcc executable is, but note that tools.avrdude.path needs to be set one folder up from where avrdude executables is located.
Per project changes
Unfortunately for us all of the above is not enough and the plugin doesn’t take all what it needed automatically at this point. As a consequence you’ll need to update the include path per project once. We’ll use the blink.ino example to show how to setup a new project correctly.
Normal Arduino project setup
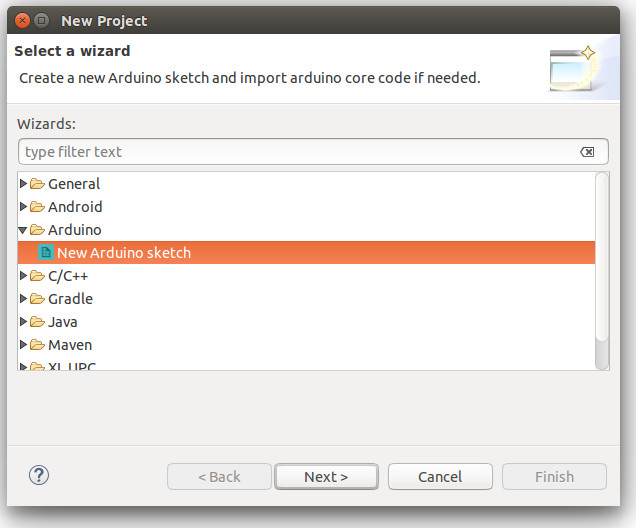
- First add a “New Arduino sketch” project (New->Project) and press Next.
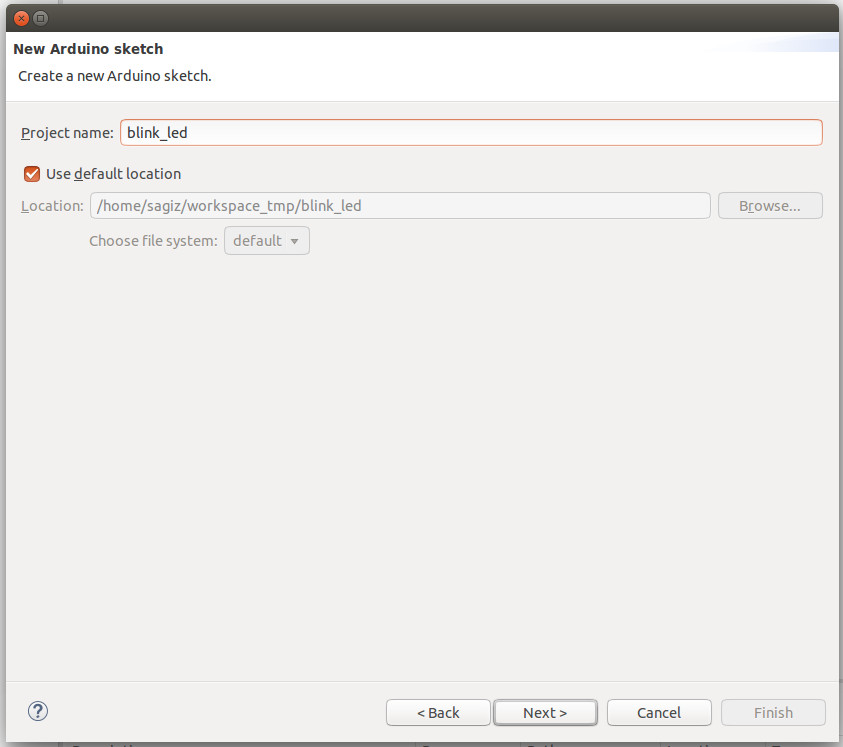
- Then name the project and press Next.
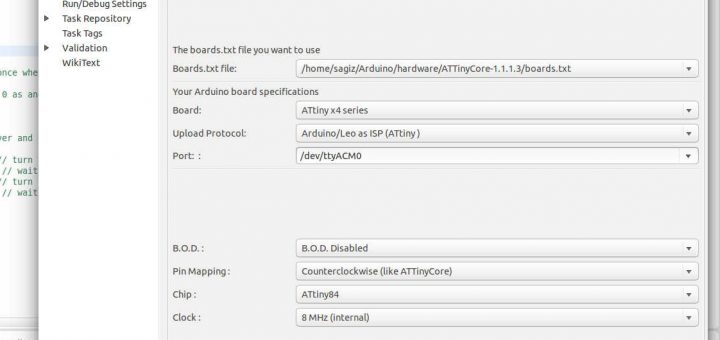
- Now provide the Arduino information and then press Next.
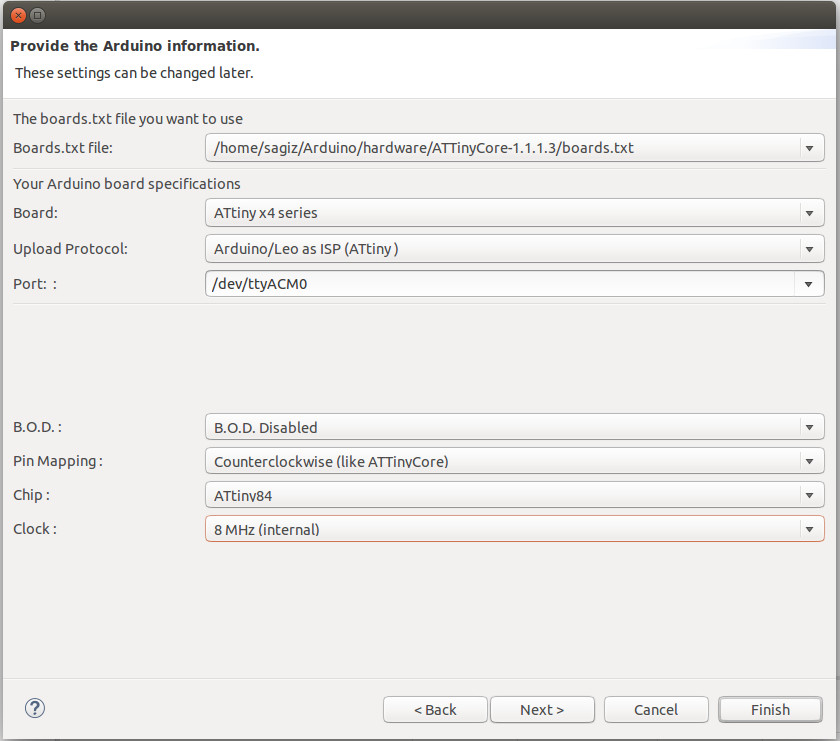
these are the settings I’m using. Make the required adaptations for your needs.
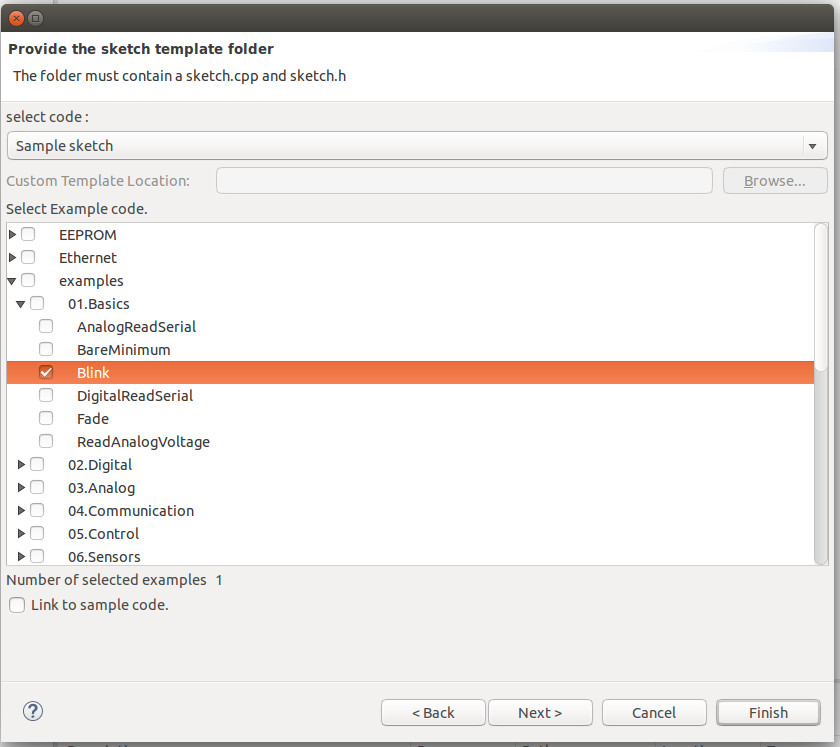
- Finally choose the blink sample sketch and press Finish.
For some reason, at least for my setup I also always have to edit the ino file and add “#include <Arduino.h>” to the top of the file to avoid build errors (if you include a file from another library which already includes Arduino.h, then it is not needed of course).
Special ATtiny project setup
- First add a new linked folder under the top core folder. The folder name should be variant and it should point to the actual board you plan to use as an Arduino. For example in the capture below it points to /home/sagiz/Arduino/hardware/ATTinyCore-1.1.1.3/variants/tinyX4.
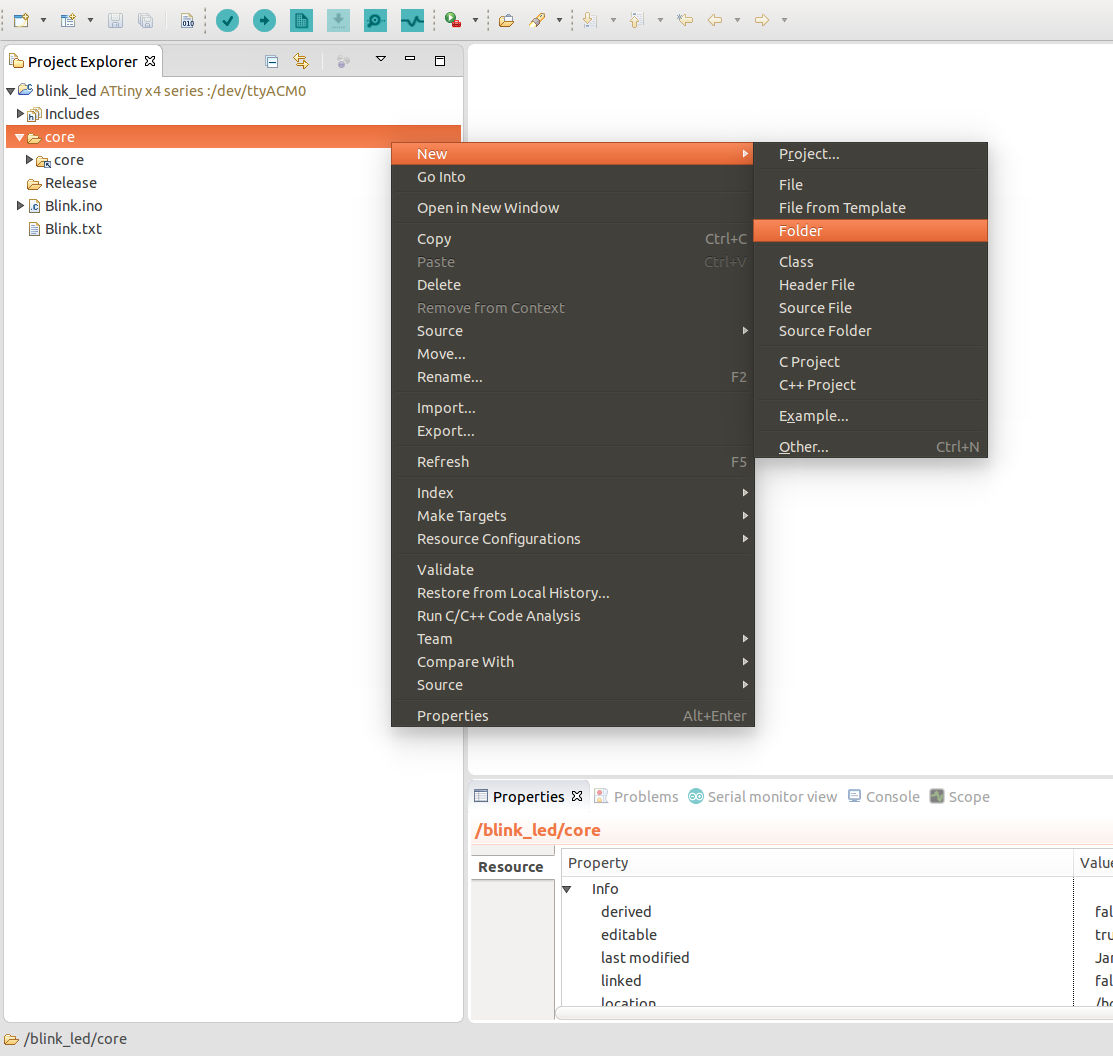
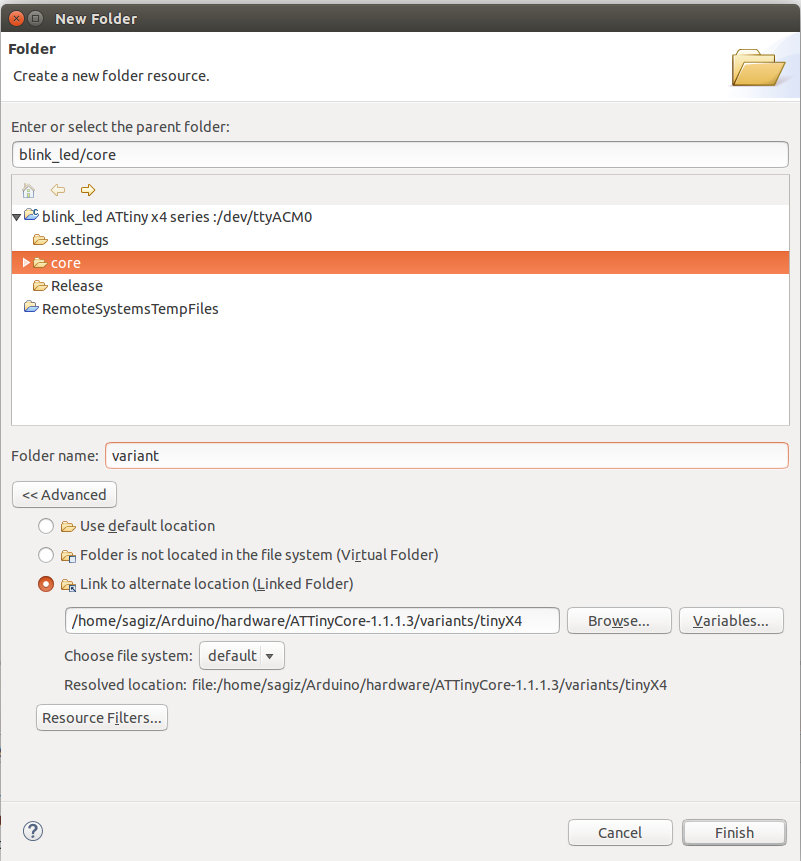
note that the name of the folder is variant and not the real name on the folder you link to. This way if you change the chip you want to use later on, you just need to replace the folder you link to and you don’t have to repeat the steps below.
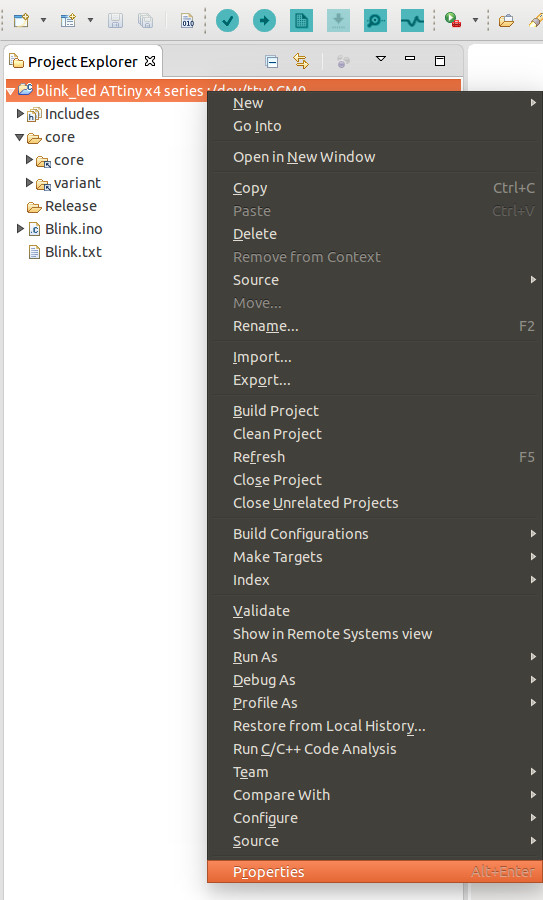
- Then open project properties.
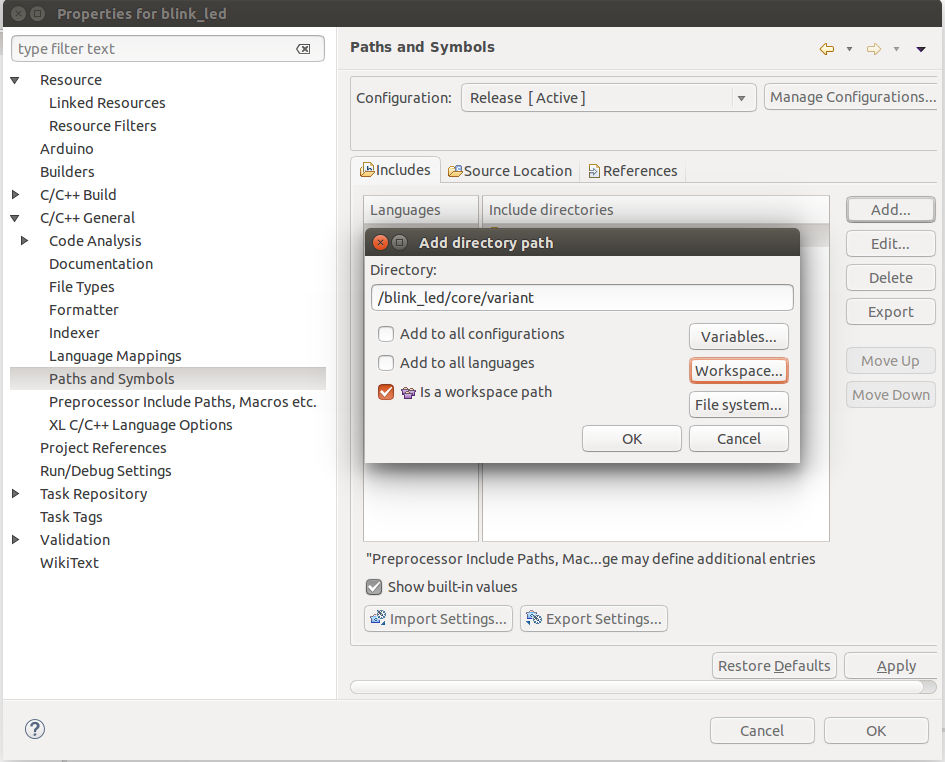
- Now choose C/C++ General->Paths and Symbols, and add a directory workspace path in the includes tab, like this:
- Make sure you do this for both the GNU C and GNU C++ rows, so you get something like this:
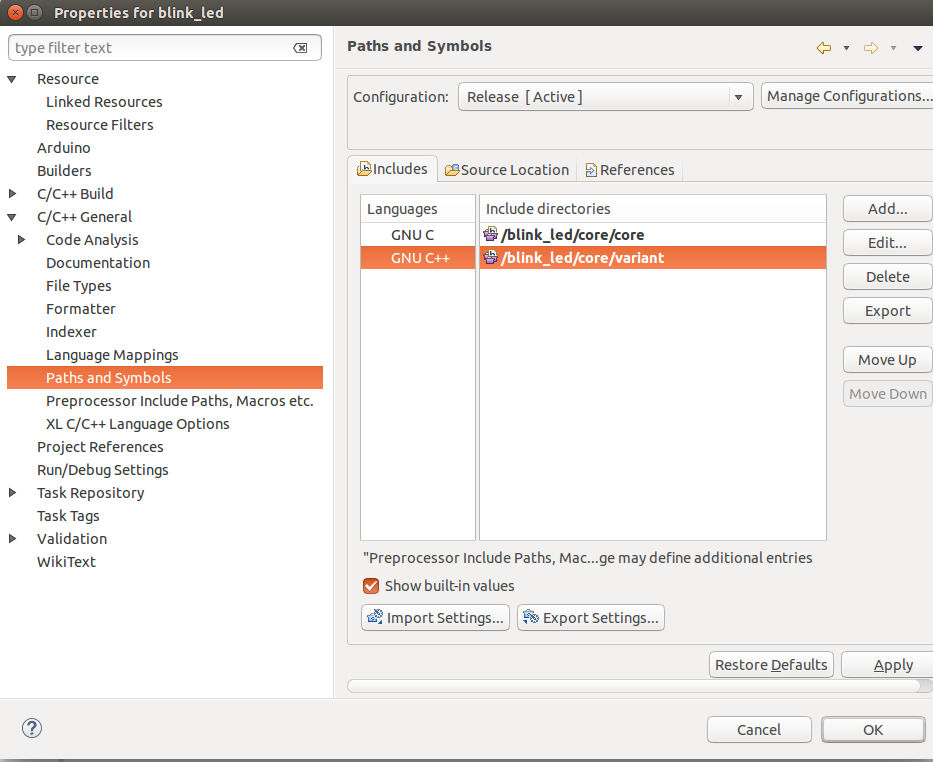
- Finally press OK and you are ready to go!
Testing this setup
- Edit Blink.ino and change the output pin number from 13 to 0 (note that the pin order is counterclockwise).
- Make sure the USB is connected to the Arduino and then press verify and upload.
- Connect a LED and a 220Ω resistor to the pin and you’ll get something like this:
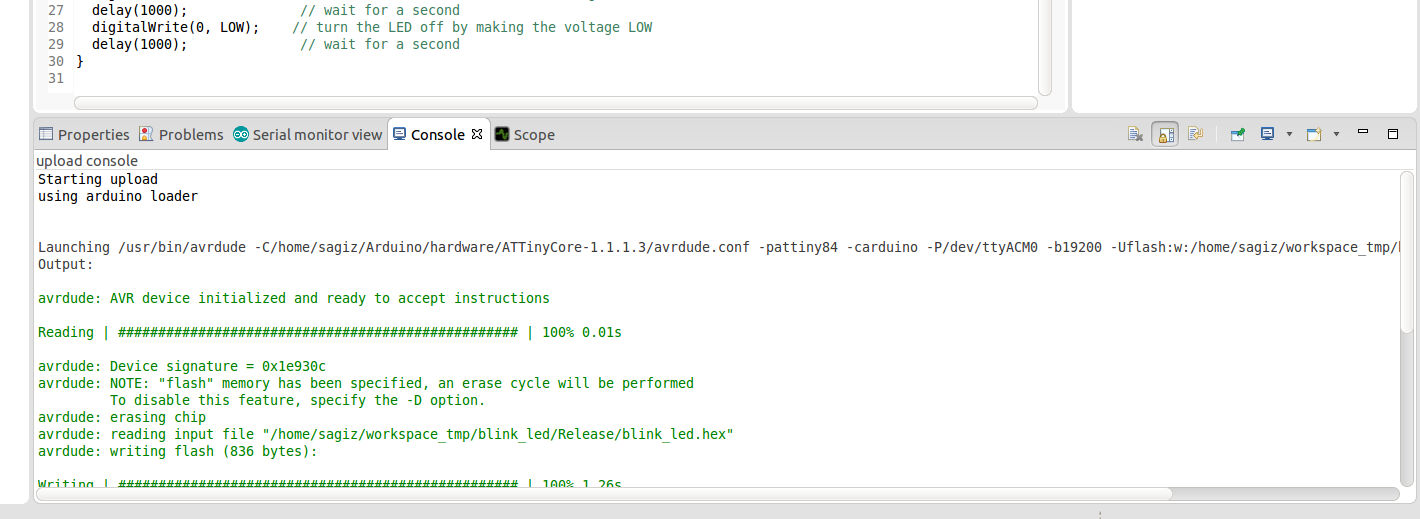
To set the ATtiny84 fuse to 8Mhz internally (note the -carduino because I’m using “Arduino as ISP”):
/usr/bin/avrdude -C/home/sagiz/Arduino/hardware/ATTinyCore-1.1.1.3/avrdude.conf -pattiny84 -carduino -P/dev/ttyACM0 -b19200 -U lfuse:w:0xE2:m
The avrdude command line syntax is copied from the Eclipse console (if you have some other upload protocol or setup, then copy it from there, but be sure about the fuse syntax before using it):
Conclusion
Eclipse has it’s strong and weak points like any IDE, but its strong coding aides (completions, source browsing, code generators, syntax highlighting, marking build errors as you type, etc.) and the great Sloeber plugin for Arduino make it an unbeatable companion for Arduino coding. This post shared my experience in making this great setup work for additional boards, specifically making it work with ATtiny chips. I hope this helps you build your Arduino projects for your favorite chip on Eclipse.
Happy hacking!


Hi
Jantje here. Thanks for the article. It is always nice to see people writing about my work 🙂
Just a question. Why don’t you use the https://raw.githubusercontent.com/damellis/attiny/ide-1.6.x-boards-manager/package_damellis_attiny_index.json
You will need the latest nightly (V4 will be released soon) but that should work out of the box.
Hi, great work. 10x for the update. I’ll look into this tomorrow and update the post accordingly. I thought I tried all the json files out there already. Guess I probably missed that one..
Now I remember why I didn’t use it – I’m getting an error in Eclipse when trying to add that json location.
The error is:
“Unable to parse /home/sagiz/eclipse/arduinoPlugin/package_damellis_attiny_index.json
java.lang.NullPointerException”
Anyway, I prefer to use official versions, so I’ll wait patiently.
I’m looking forward for your next plugin release. Keep up to good work!
HI Thanks for the post, How do you burn bootloader on Attiny chip?
I started with the Arduino IDE, as described here – http://highlowtech.org/?p=1695 , and after you burn the bootloader you can switch to Eclipse.