RIGOL DS1054Z screen capture on Linux
While preparing for some future posts about electronics, I wanted to easily capture my oscilloscope screen and to experiment with its remote APIs. Looking over the internet and manual I found some information about it, but not exactly what I wanted. As I’m more a traditional Linux kind of guy, I prefer to capture with a single command line. You can also wrap this in a small script, as we’ll do in this post as a small exercise, but this is optional.
RIGOL DS1054Z screen capture using SCPI
RIGOL supports the SCPI (Standard Commands for Programmable Instruments) protocol. One of these commands allows a capture and we’ll use it. Before we can use this protocol we’ll connect the scope to the PC. There are several ways to connect your scope to a PC. I’ll be using the LAN connection, which seems the easiest to me.
The commands and their details are listed in the MSO1000Z&DS1000Z_ProgrammingGuide_EN.pdf supplied on the CD you got with your scope.
Step by step instructions
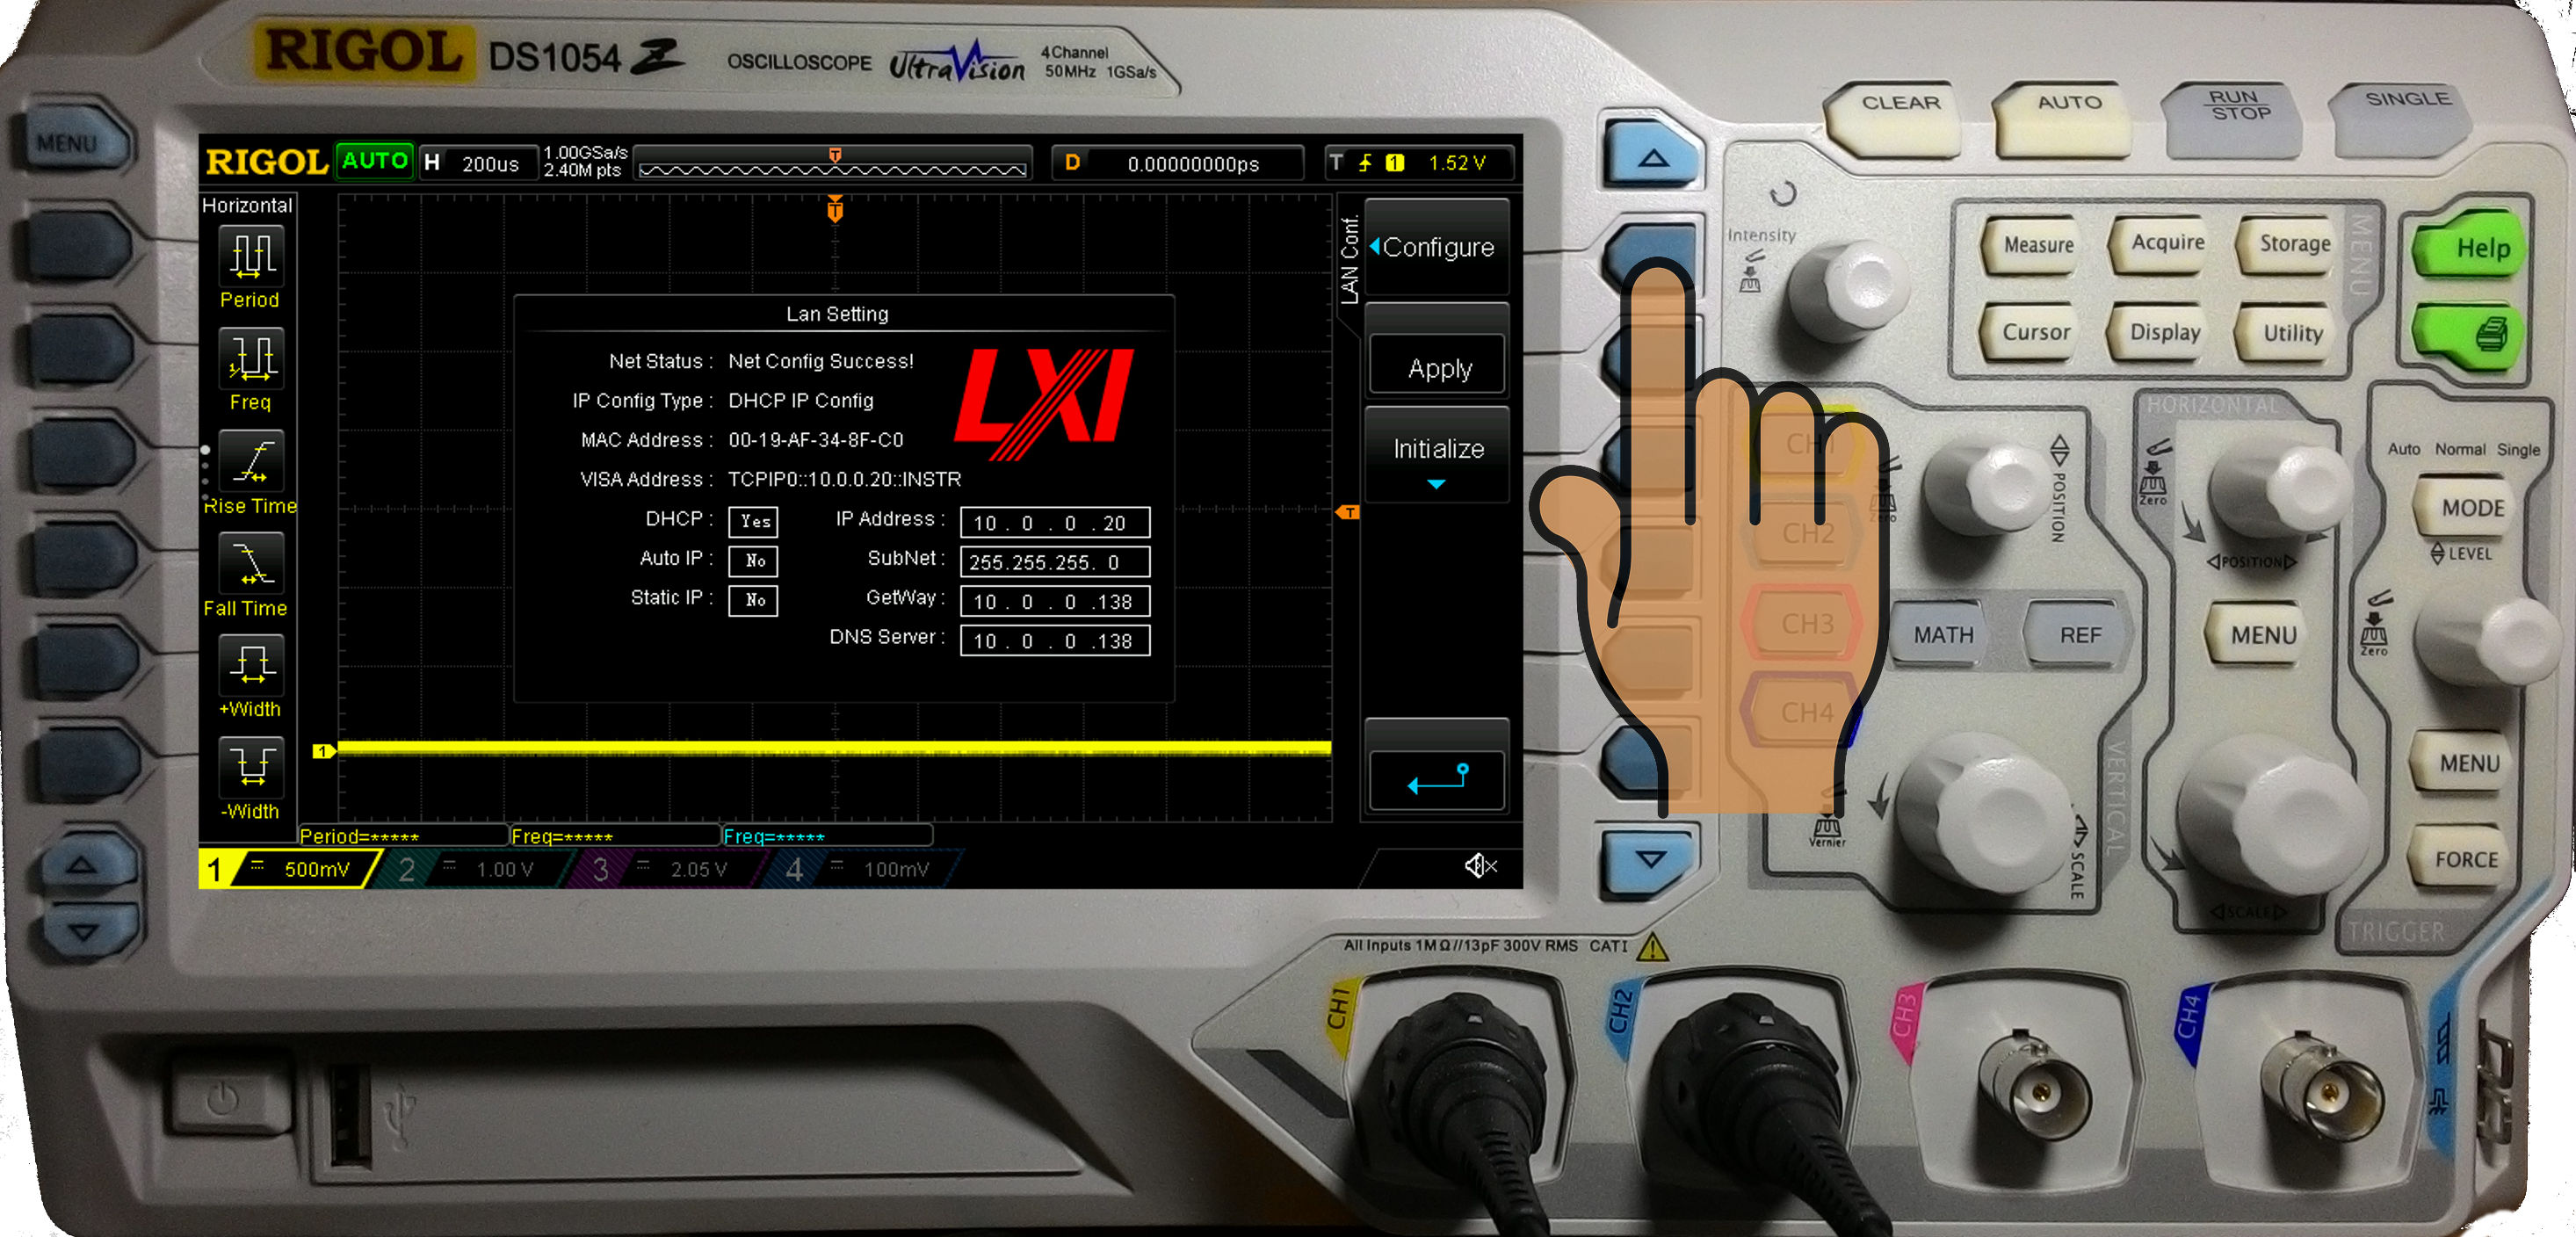
Connect your oscilloscope to your local LAN via it’s Ethernet LXI connector, located on the rear-left side (item 2 in the Rear Panel Overview figure below). By default the scope will use DHCP to get a dynamic IP address. I’m currently going on with the default settings, assuming you connected it to your local router which is usually also configured as a DHCP server.
Rear Panel Overview figure from the User Guide (connect to the LXI connector numbered as 2):

To see your allocated IP address on the oscilloscope screen, press these buttons:
- Utility
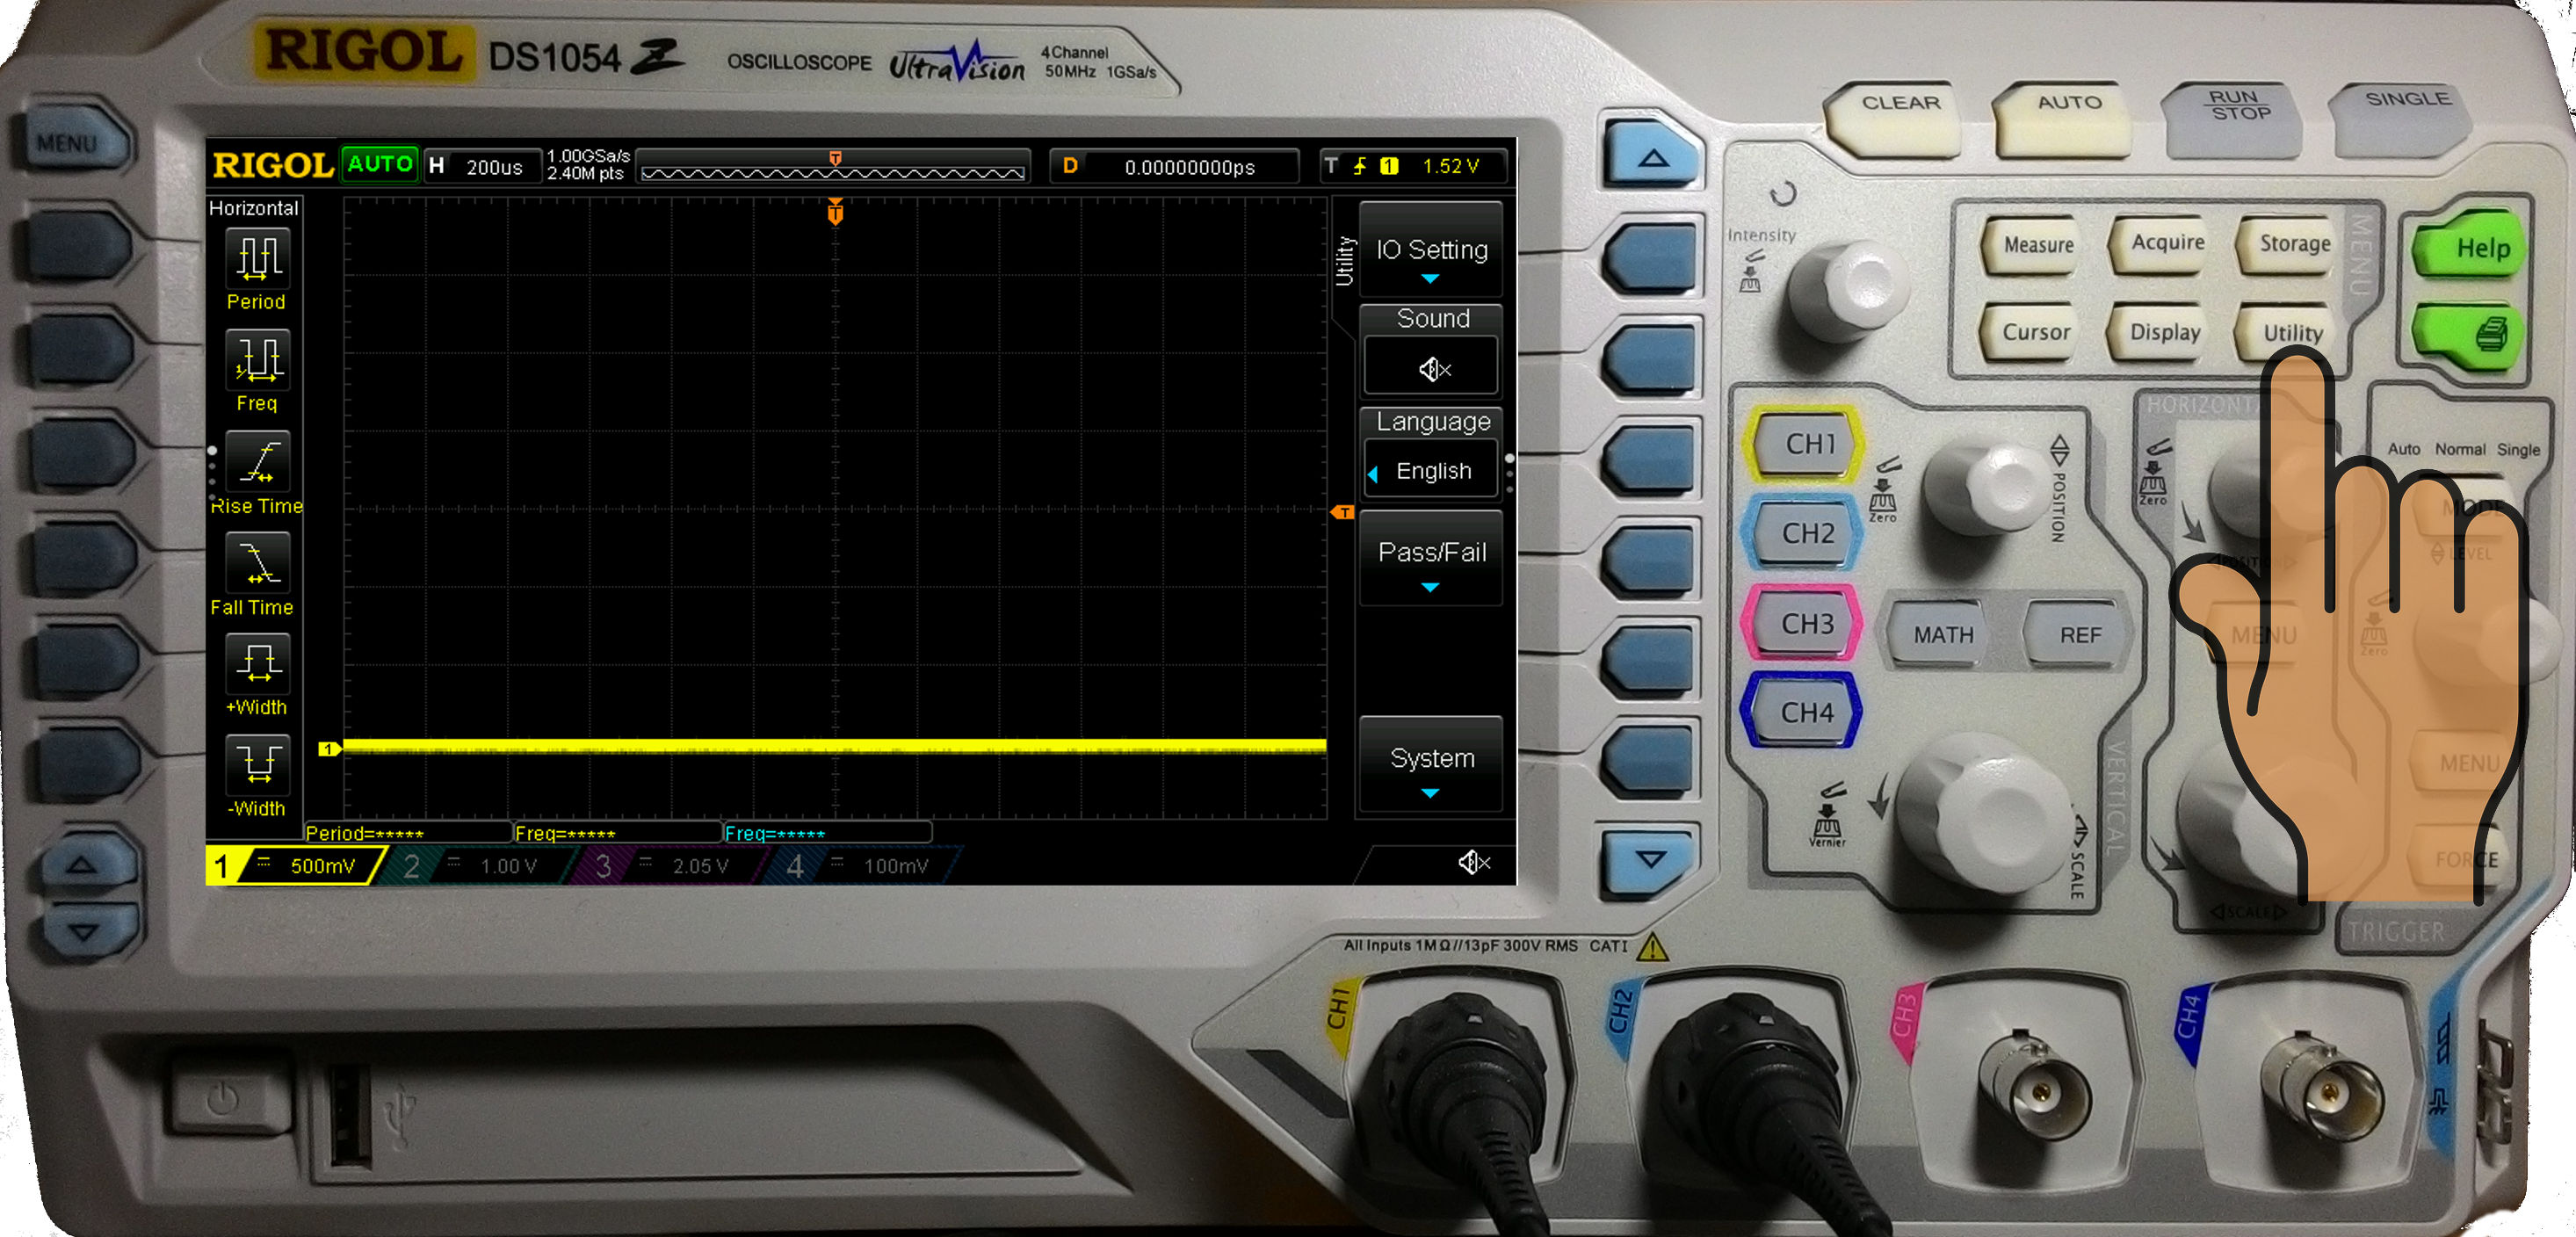
- Top function key
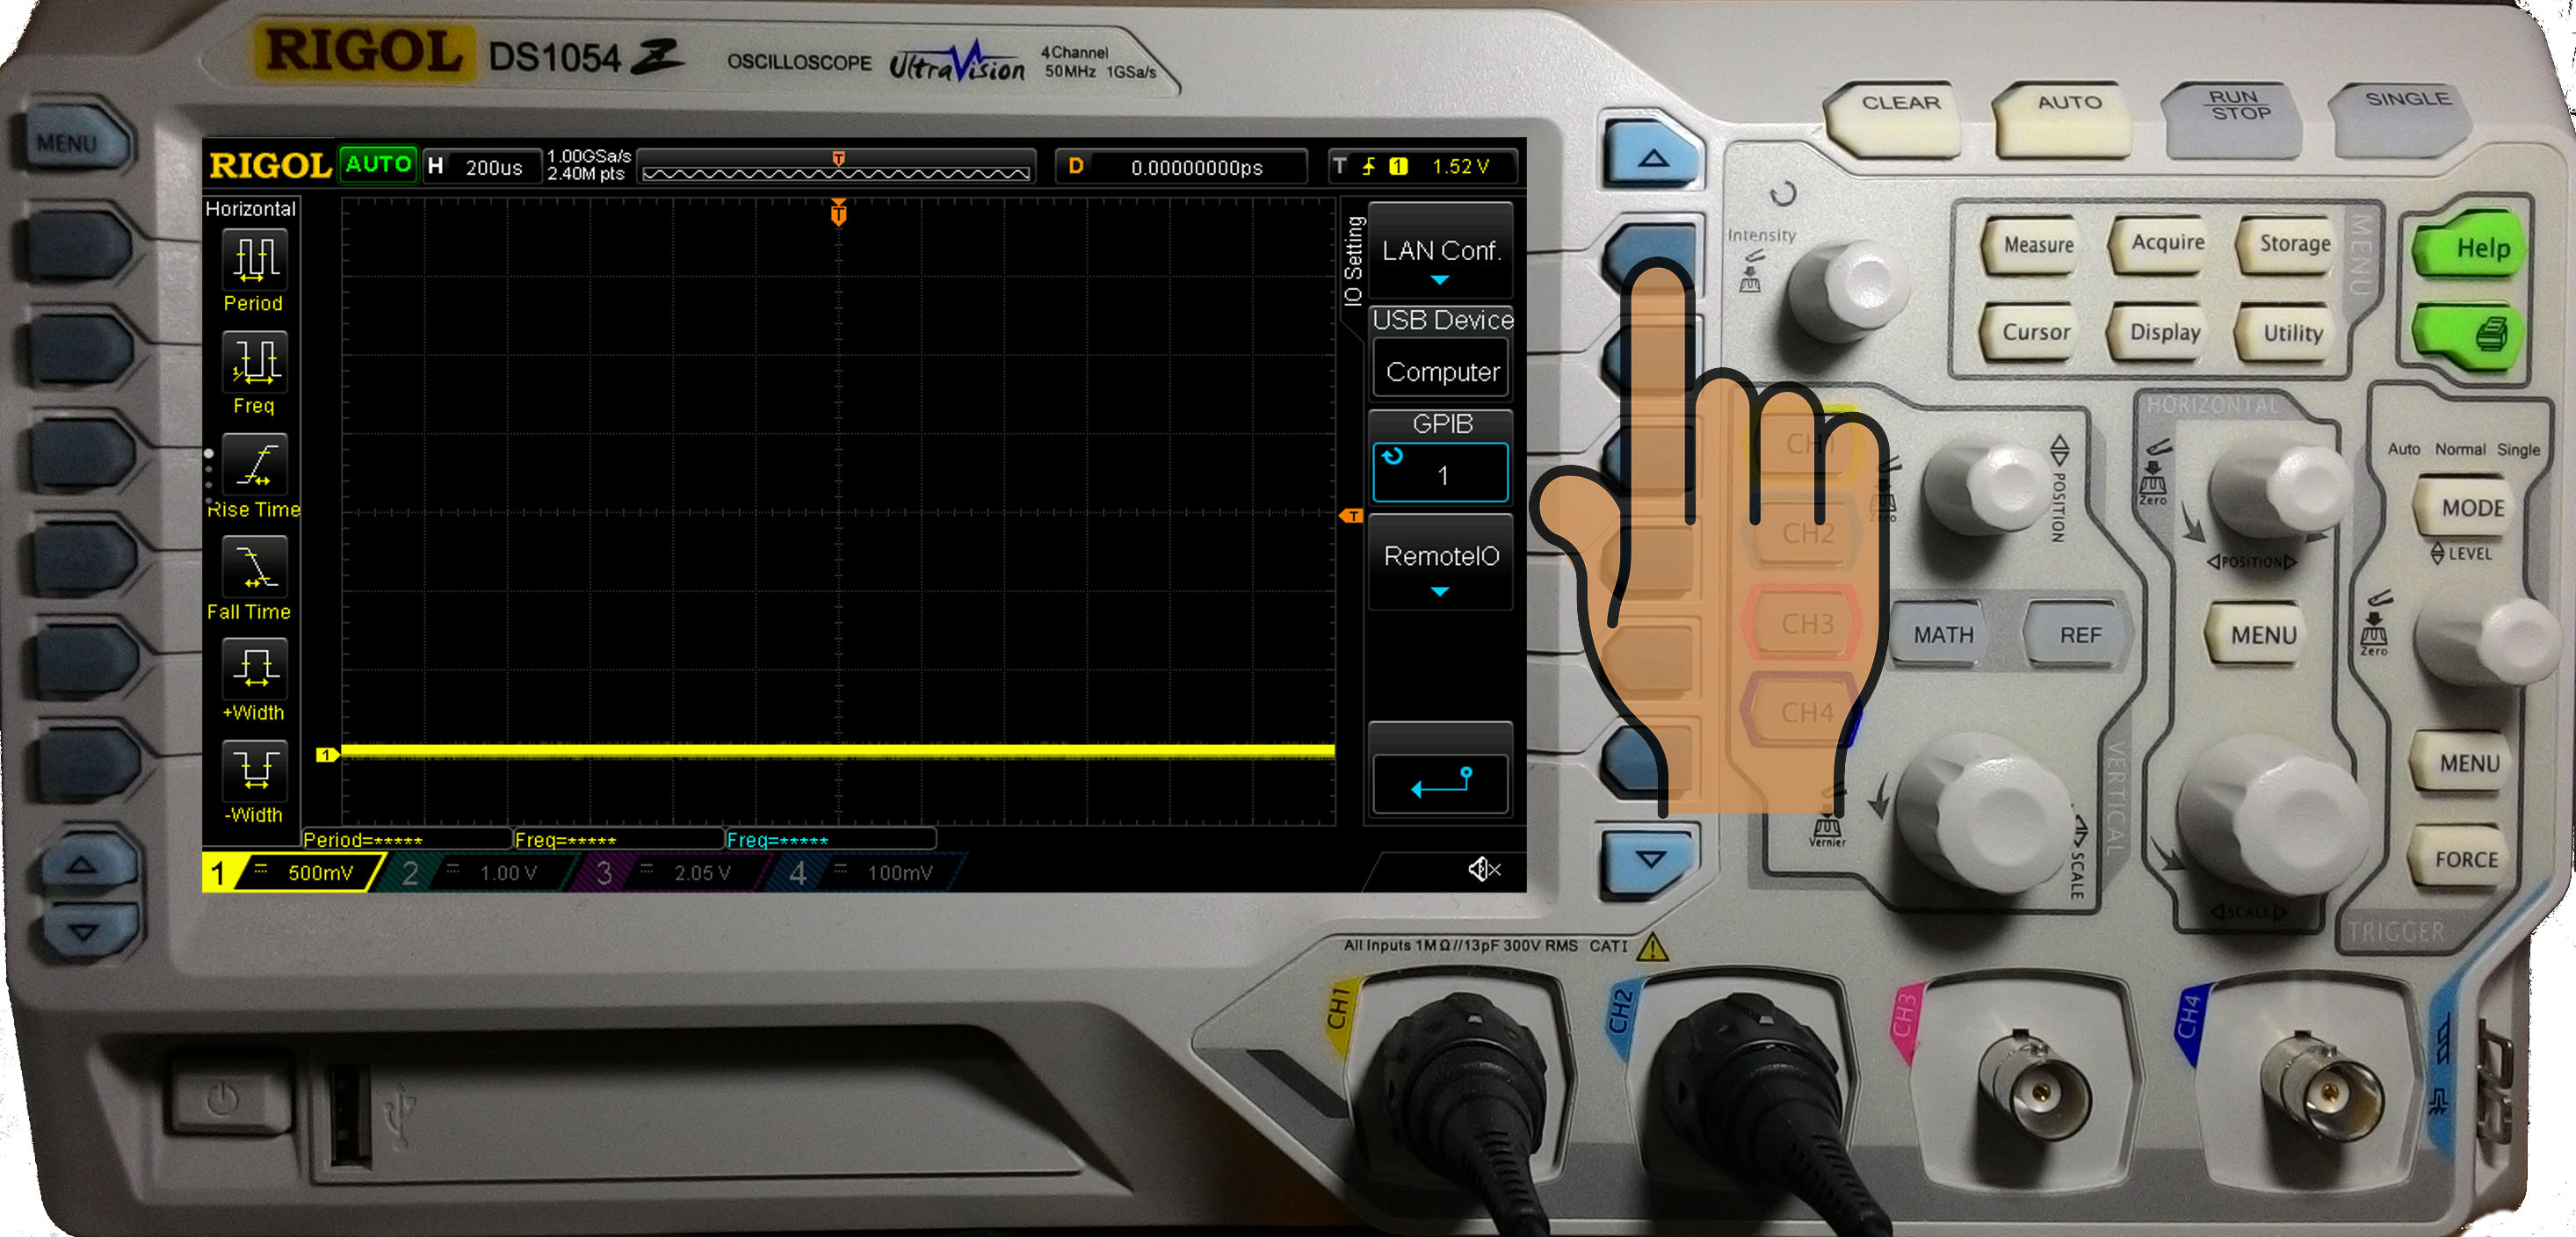
- Top function key (again)
You can allocate a fixed IP address for the scope’s MAC address on your router’s DHCP settings (optional).
To easily use the LAN interface from the command line we’ll need 2 packages, which on Ubuntu I’m installing like this:
sudo apt-get install netcat arp-scan
Here is how to find the DHCP assigned IP next time without going through all the scope screens:
sudo arp-scan -localnet | perl -ne 'print "$1\n" if /(\S+).*Rigol/i'
It is possible to scan for other things as well (examine the output from: sudo arp-scan -localnet).
Now capture with: echo ‘:display:data?’ | netcat -w 20 IP 5555 | tail -c +12 > FILENAME.bmp
Replace IP and FILENAME accordingly. For example, this is what I used:
echo ':display:data?' | netcat -w 20 10.0.0.20 5555 | tail -c +12 > capture.bmp
… and got this capture:

This is all you have to do! This one line – “echo ‘:display:data?’ | netcat -w 20 IP 5555 | tail -c +12 > FILENAME.bmp“
You can experiment interactively with SCPI with “netcat IP 5555“
A small script wrap
I have a directory named ‘scripts‘ with a bunch of utilities I’ve written over the years. It’s in my path and after I wrap something for my own use I can easily access it later form the command line. I added a small convenient script for the above so I won’t have to manually search for the IP all the time, or copy paste the lines above from my documentation notes:
Summary
- Connect your scope to your LAN so you could use SCPI with netcat to it’s IP at port 5555.
- Capture with this one liner: echo ‘:display:data?’ | netcat -w 20 IP 5555 | tail -c +12 > FILENAME.bmp
- If you wrap with a script then put your own scripts at your PATH for easy access.
- See also on the YouTube channel.
See you next time!