OpenCV GUI with CanvasCV
OpenCV is great, but it always seemed to be missing something on the GUI side. Saying that this is not it’s purpose is true, but still you feel like something is missing there. Yes you could learn a GUI toolkit, but it comes with lots of dependencies and a steep learning curve. OpenCV GUI with CanvasCV is a new approach that I’m introducing here today.
Note there are only screenshots here today – there is a lot of tutorial code and example code on the project page – see the link at the end of the post.
OpenCV GUI with CanvasCV highlights
Non intrusive design
The idea is to use the OpenCV coordinate system, and the OpenCV main loop way of doing things.
Following these rules simplifies using this framework to anyone familiar with OpenCV.
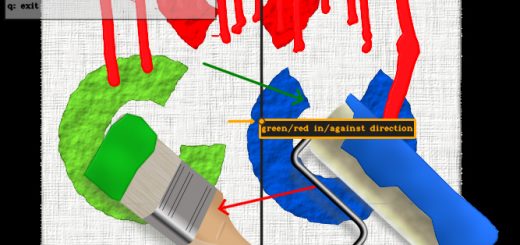
Drawing shapes with the mouse
It all started when from real needs:
- Adding a line on the screen for the user to mark a line that tracked items can cross from one side to the other.
- From this came to life canvascv::LineCrossing.
- Letting the user draw an area on the screen that feature detections should only happen there.
- From this came to life the canvascv::Rectangle and later on canvascv::Polygon.
- Some things on the screen have a relation between them, so we should allow the user to connect them – marking it visually.
- So the canvascv::ShapesConnector was born.
This way came to life a collection of shapes that the user can draw with the mouse and you are aware of in the code (you can also create them from the code if you need).
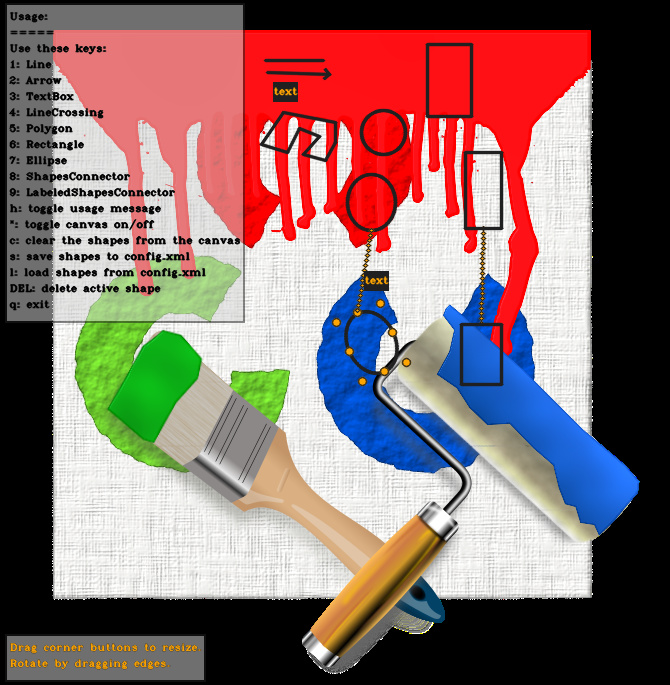
Saving shapes to a file
Now that the administrator spent time on visual configuration, we need to keep it for future runs.
And so it came to be that you can save shapes to a file and load shapes from a file.
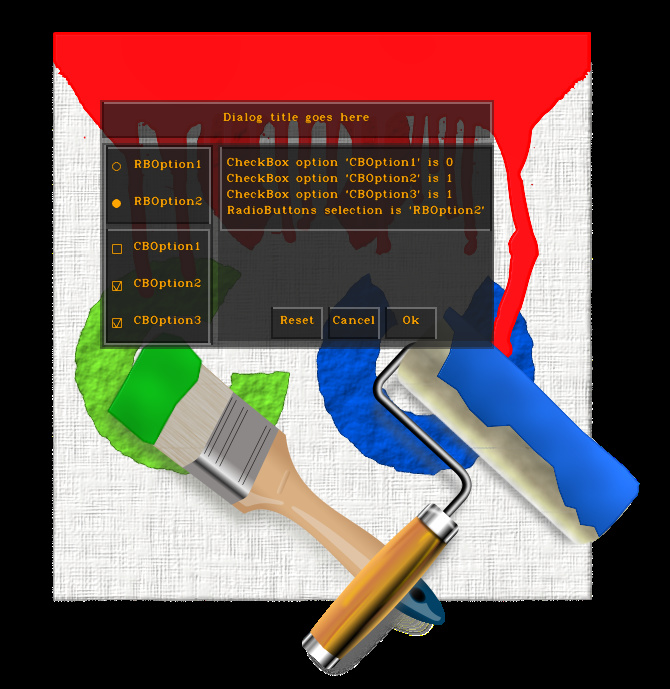
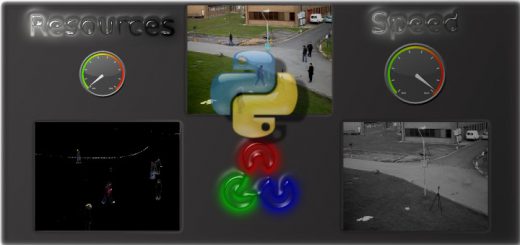
Widgets
A user interface can be hand drawn with the OpenCV drawing functions, but it’s not something you would often like to do yourself.
CanvasCV provide a set of basic GUI widgets that you can use to draw your own interface on the screen.
The widgets have a beautiful semi transparent background so the API doesn’t seem to obscure the scene (a simple on/off toggle can be used to remove any obscuration).
Avoid widgets for simple cases
- You just want to write on the screen
- Use the setScreenText()
- Exit with a fatal user message in a GUI window
- Use the Canvas::fatal()
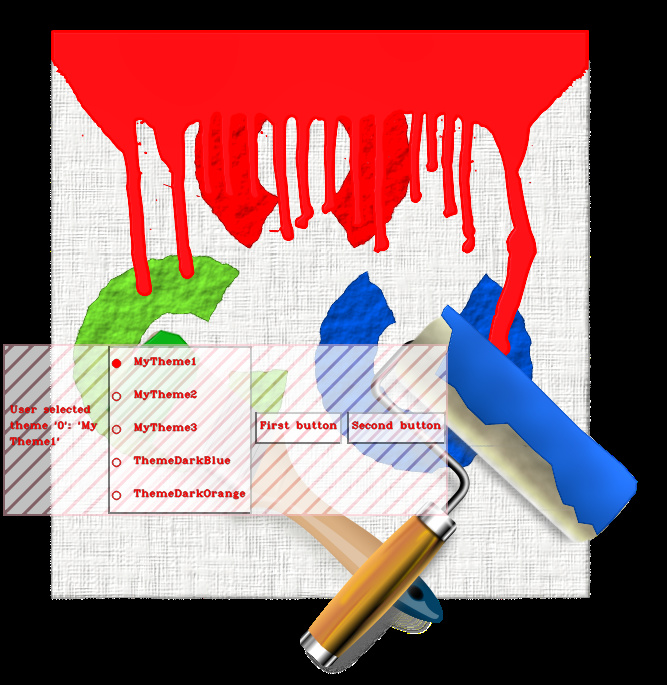
Themes
GUI is at it’s best when the appearance is consistent.
The canvascv::ThemeRepository comes with 2 themes, the default being ThemeDarkOrange.
You can extend the current themes and add your own themes easily enough.
Getting CanvasCV
- First, as always, it’s free for personal and commercial use.
- Visit the project homepage for most up to date information.
- Browse the code at the GitHub page.
That’s all for today.
Hope you’ll find this useful,
Sagi.


For a fully fledged GUI integrating OpenCV, there is always the excellent Qt
You’re right. I used it before and will probably use it again. It’s all about fitting the tool for the job. IMHO Qt is an overkill for many projects.