Faster smiles on OpenCV with TBB

Starting to work on OpenCV with TBB is simpler than you think. Here is a walk-through of modifying the smiledetect.cpp sample provided with OpenCV to work 30% faster. We’ll discuss the why, when and how. You’ll learn what to look out for and how to go on further.
Using OpenCV with TBB – discussion
Before we start
First of all – if you don’t know what TBB is, then take a look here.
You don’t have to build OpenCV with TBB for this tutorial. However, I recommend that you do build OpenCV with TBB if you’re planning on using TBB yourself with it in the future.
Therefore, I’m only going to assume you already have TBB installed and you know how to compile and link with it. The referenced GitHub code is using the Ubuntu libtbb-dev package.
When would you want to use TBB
OpenCV is already paralleled in many of its algorithms. Due to this fact you won’t always get much more from adding parallelism to these parts. However, usually before getting to the heavy auto-paralleled algorithms you have some tedious sequential manipulations and transformations to perform on the source image. It can be converting colors, resizing, smoothing, morphology, etc. It can be sometimes even beneficial to decouple the processing chain from the 2 small IO operations of (1) getting an image/frame from a storage and (2) presenting it on the UI.
Usually a good sign that your application can accomplish more with TBB is if it is not going as fast as you need on your target hardware, but looking at the CPU usage you see that there are more resources available to use.
When not to use TBB
Simply check the CPU resources used when your application is running. If it’s above 85%, then it’s already using the CPUs pretty good. Check other approaches, like resizing the input images, detecting on larger scales, etc.
What we’ll cover here
We’ll be covering one of the most trivial but still very useful way of using TBB, the parallel pipeline. There are more complicated threading algorithms and tools which TBB provides, but they won’t always match your needs. What we cover here will match most of your daily needs.
Using OpenCV with TBB – walk-through tutorial
The use case
For the purpose of demonstration I have chosen a cpp sample provided with OpenCV, called smiledetect.cpp. I encourage you to build this sample and browse through its code before we start. I’m not going to explain what this sample is doing (detecting smiles .. DUH), but simply try to make it work faster. The original file, with very small modifications, is available on my GitHub link below and is built as part of the normal build for comparing performance.
Unfortunately, on my 16 cores i7 CPUs, using a normal frame rate, this might not be the best showcase for using TBB. Here for a normal frame rate it works fast enough. Nevertheless, for the sake of argument let’s assume that this smile detection is doing an offline count of smiling faces from video files and its throughput is important.
Preparing for the use case
Assuming this is the use case, I’m going to change the code a little so we’ll have something to compare to. Most notably I’ll do this:
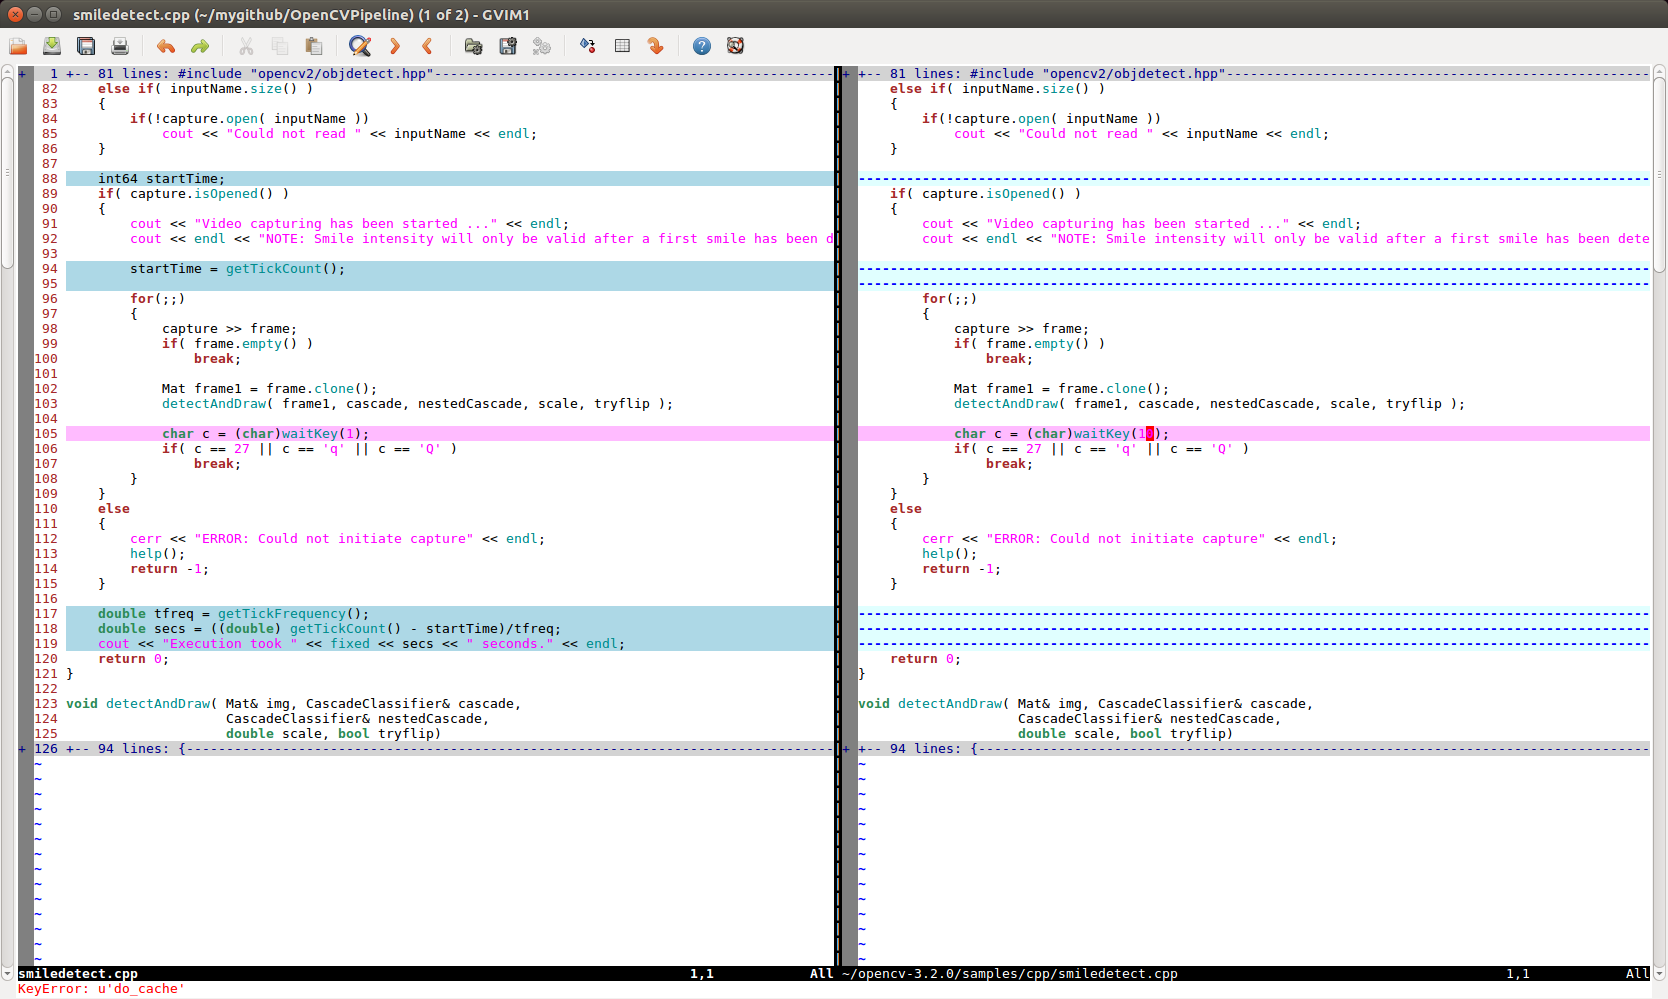
- Set the delay for getting the user input to 1 millisecond.
- Add a summary at the end of how long it took for the processing of all the frames.
The output is still being sent to the GUI, and the UI of the original sample wasn’t changed to match this made up use case, but it’s enough for our purposes – trying to process the frames as fast as possible.
Acquiring base results to compare against
Executing the original sample code, built in Release mode, against a Release build of OpenCV:
sagiz@lab1:~/mygithub/OpenCVPipeline/build$ ./smiledetect --cascade="/usr/local/share/OpenCV/haarcascades/haarcascade_frontalface_alt.xml" --smile-cascade="/usr/local/share/OpenCV/haarcascades/haarcascade_smile.xml" ~/opencv-3.2.0/samples/data/Megamind.avi --scale=2

This program demonstrates the smile detector.
 Usage:
 ./smiledetect [--cascade=<cascade_path> this is the frontal face classifier]
 [--smile-cascade=[<smile_cascade_path>]]
 [--scale=<image scale greater or equal to 1, try 2.0 for example. The larger the faster the processing>]
 [--try-flip]
 [video_filename|camera_index]

Example:
 ./smiledetect --cascade="../../data/haarcascades/haarcascade_frontalface_alt.xml" --smile-cascade="../../data/haarcascades/haarcascade_smile.xml" --scale=2.0

During execution:
 Hit any key to quit.
 Using OpenCV version 3.2.0

Video capturing has been started ...

NOTE: Smile intensity will only be valid after a first smile has been detected
 init done
 opengl support available
 Execution took 6.065842 seconds.
We’re going to make it work ~ 30% faster, which means work in ~ 4 seconds instead of ~ 6 seconds. It doesn’t seem much, but on slower CPUs and with a longer video, 30% is a lot.
Simple design
TBB’s parallel pipeline is ideal for paralleling sequential code. It allows you to form a chain of parallel workers, moving along a payload through the pipeline in a strict order, just like in an assembly line.
We’re going to target the detectAndDraw() function of the original sample. It has several sequential steps which can be paralleled. Imagine a world in which none of these steps is waiting for the previous step. All these steps will all happen roughly at the same time.
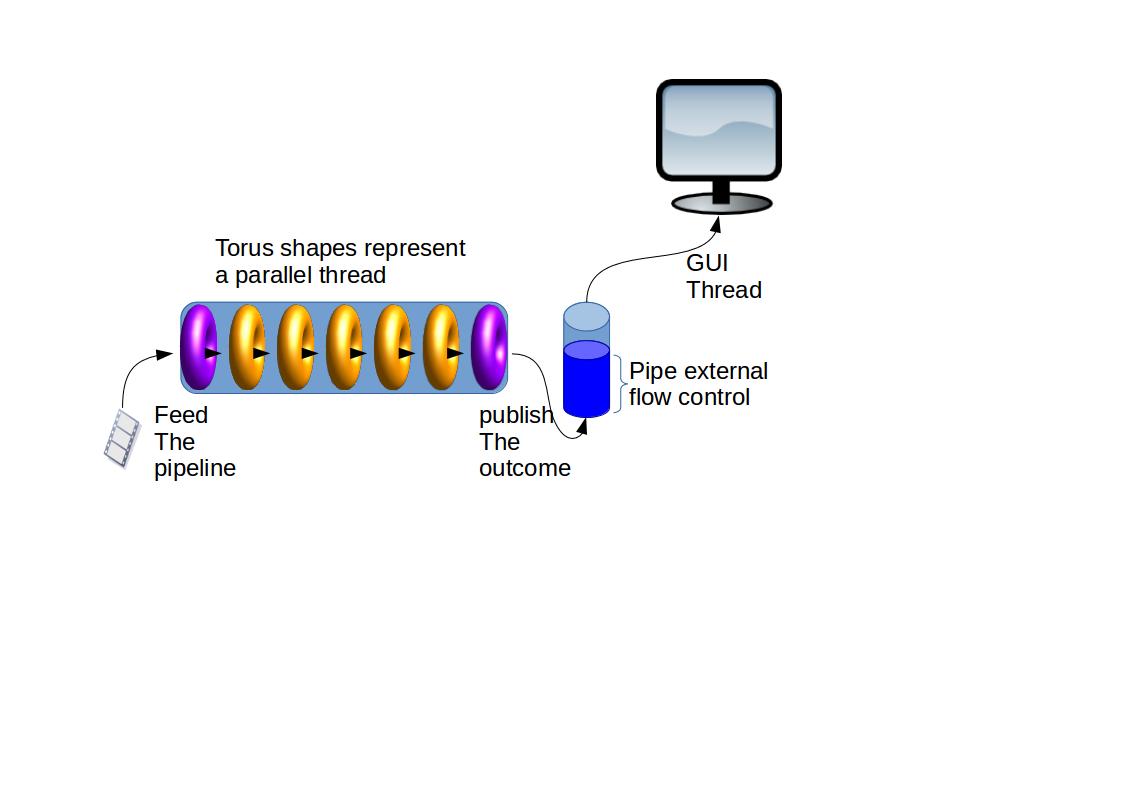
High level flow, before we’ll look at the code:
- All the local data of the original detectAndDraw() function is going to be encapsulated in a small payload structure to be passed along the pipeline.
- The TBB pipeline run() method (under the hood of the TBB wrapping function we’ll use) is blocking, so it will be created by the main() function to work in another thread, as for not to block the GUI.
- The pipeline will feed itself directly from a VideoCapture object.
- The pipeline will output processed frames to the main() function via a TBB thread safe queue.
- The main() function can stop the pipeline.
- The pipeline can notify the main() function that there are no more frames.
Visualize it like this:
The main things to look out for here are:
- Don’t parallel code parts which work with objects which are not thread safe. In our case these are the CascadeClassifier objects.
- Don’t allow the parallel pipe to run wild without limiting it’s output buffer, otherwise it might consume all the RAM on your machine. Here we’ll use a bounded queue from TBB with a capacity of 2 messages at the output of the pipeline. If the GUI is slow or has a pause feature, then the pipeline will halt after inserting 2 messages into the output queue.
Code
declarative stuff (see code below)
- Notice the ProcessingChainData structure which will travel along the pipeline. It contains all the local data of the original detectAndDraw() function. Notice the function is now named detectAndDrawTBB(). It will run the pipeline so it needs the VideoCapture to feed it frames and a queue to send the output of the pipeline to.
The main() function (see code below)
- The main() function does what we planned for it. It creates the pipeline to work in another thread. Transferring it a VideoCapture and a bounded queue for its input and output. The pipeline is going to be self sufficient and read the video frames by itself. The for-loop is iterating over the queue to get processed frames to show to the user, while maintaining the UI responsive to keyboard presses. Most noteworthy items here:
- I’m limiting the capacity of the queue to 2 messages to control RAM usage.
- The termination is handling the flush of the queue. This is because we might be terminating on a keyboard press while the pipeline is still waiting for the queue capacity to decrease and doesn’t know we’re done. This is why the flush of the queue is mandatory before calling join() on the pipeline thread.
- You really do want to wait for the parallel pipeline to finish with join() to avoid random crashes.
a better loop would keep the last ProcessingChainData as long as a new one is not present and will handle UI input and output regardless of the existence of a new input from the queue.
Constructing the parallel pipeline (see code below)
- detectAndDrawTBB() builds the pipeline by taking all the parts that we want to parallel and making them filters of a pipeline. TBB calls them filters, but you can think of them also as ‘workers’ or ‘processors’.
- Most noteworthy items here:
- The filter is serial_in_order, which is what we need to keep the orders of the frames. If you work on an unsorted input, such as multiple images, then choose a more relaxed scheme.
- Each filter content is almost a copy paste from the original detectAndDraw() function. The difference is that the previously local data is now the struct based payload that the pipeline is moving across the “assembly line”. Each filter gets the payload, works on it and returns it.
- The first filter creates the payload with new.
- The last filter dispatches the payload for the main() function to consume via the queue.
- The main() function will delete the payload after using it.
I don’t recommend using lambda expressions for this in production. I would write properly encapsulated “processor/worker classes” which are easier to maintain.
Output of executing this code
sagiz@lab1:~/mygithub/OpenCVPipeline/build$ ./smiledetect_tbb --cascade="/usr/local/share/OpenCV/haarcascades/haarcascade_frontalface_alt.xml" --smile-cascade="/usr/local/share/OpenCV/haarcascades/haarcascade_smile.xml" ~/opencv-3.2.0/samples/data/Megamind.avi --scale=2

This program demonstrates the smile detector.
Usage:
./smiledetect_tbb [--cascade=<cascade_path> this is the frontal face classifier]
 [--smile-cascade=[<smile_cascade_path>]]
 [--scale=<image scale greater or equal to 1, try 2.0 for example. The larger the faster the processing>]
 [--try-flip]
 [video_filename|camera_index]

Example:
./smiledetect_tbb --cascade="../../data/haarcascades/haarcascade_frontalface_alt.xml" --smile-cascade="../../data/haarcascades/haarcascade_smile.xml" --scale=2.0

During execution:
 Hit any key to quit.
 Using OpenCV version 3.2.0

Video capturing has been started ...

NOTE: Smile intensity will only be valid after a first smile has been detected
init done
opengl support available
Execution took 4.029196 seconds.
As you can see we got ~ 30% improvement in performance.
Summary
- Parallelism for sequential work is easy with TBB parallel pipeline.
- Check CPU usage before trying to improve by parallelism.
- Lookout for the well known pitfalls of using multi-threading programming.
- Where to go from here?
- Download and build the code from here.
- Some exercises:
- Change the code to use classes instead of lambda expressions.
- Add a pause capability to the GUI while using the pipeline.
- The pipeline is actually as fast as its slowest filter. Try to gather statistics for each filter to see which one is the slowest.
- Explore more features of TBB.
See you next time.


Great post, can’t wait to try this out.